> ## Documentation Index
> Fetch the complete documentation index at: https://benchgen.com/docs/llms.txt
> Use this file to discover all available pages before exploring further.
# Run Inference
> Serve a model you trained as a live, OpenAI-compatible endpoint and send it requests.
After you train and save a model, you run inference on it by deploying it from its model card. Running a model loads it onto a GPU and exposes an OpenAI-compatible endpoint you can send requests to. This is the same **Run Inference** flow used for any model on BenchGen, so the full walkthrough lives in [Deploy an inference model](/eval/run-an-inference-model).
***
## Prerequisites
* A saved model from a training run (see [Merge & save a model](/train/merge-lora-adapter)), or any model in your workspace (see [Add a model](/eval/add-a-model)).
* A GPU node with free capacity.
***
## Steps
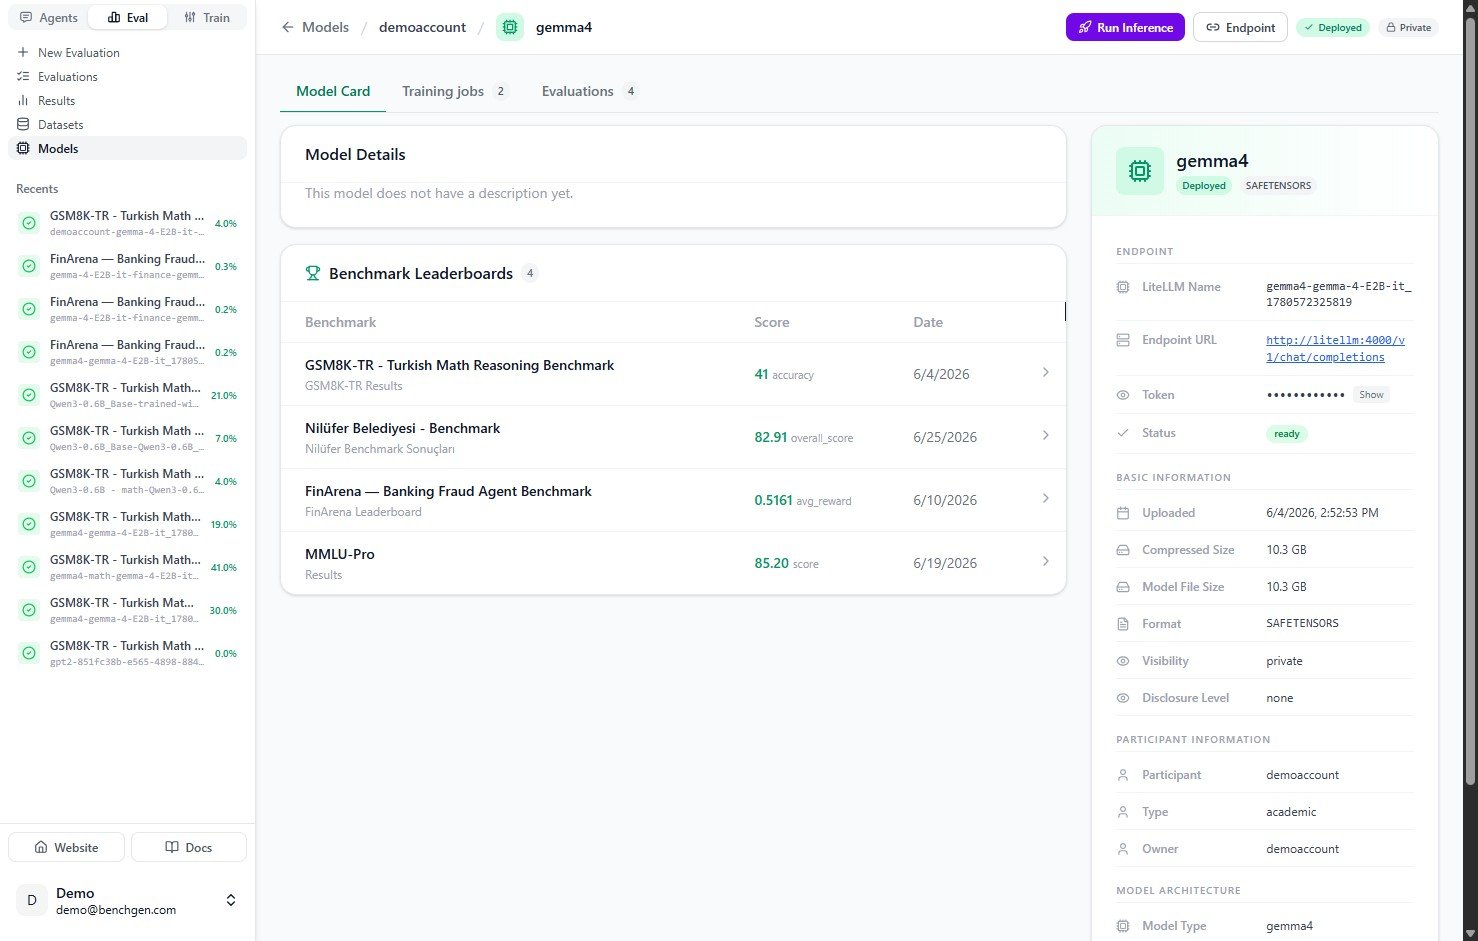
### 1. Open the model and click Run Inference
Open the model's card and click **Run Inference** in the top right.
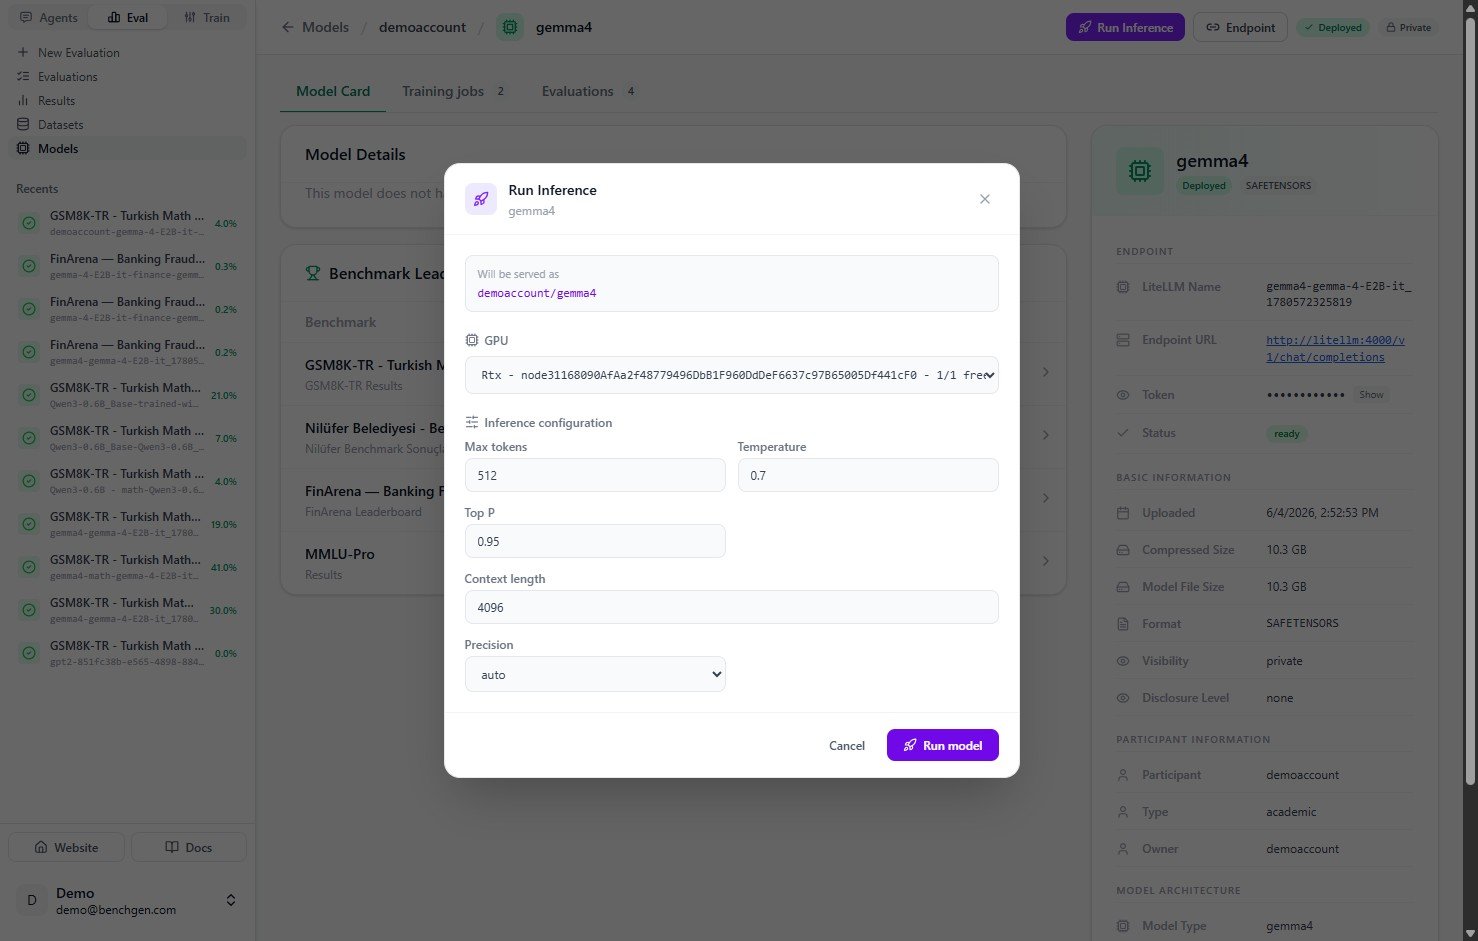
 ### 2. Configure and start
In the **Run Inference** dialog, pick a **GPU** and review the inference settings (max tokens, temperature, top P, context length, precision), then click **Run model**.
### 2. Configure and start
In the **Run Inference** dialog, pick a **GPU** and review the inference settings (max tokens, temperature, top P, context length, precision), then click **Run model**.
 ### 3. Wait for the endpoint to be ready
The status reads **Deploying** while the model starts up, then turns to **running** once it's live. The model card's endpoint panel fills in with the LiteLLM Name, Endpoint URL, and access token.
### 3. Wait for the endpoint to be ready
The status reads **Deploying** while the model starts up, then turns to **running** once it's live. The model card's endpoint panel fills in with the LiteLLM Name, Endpoint URL, and access token.
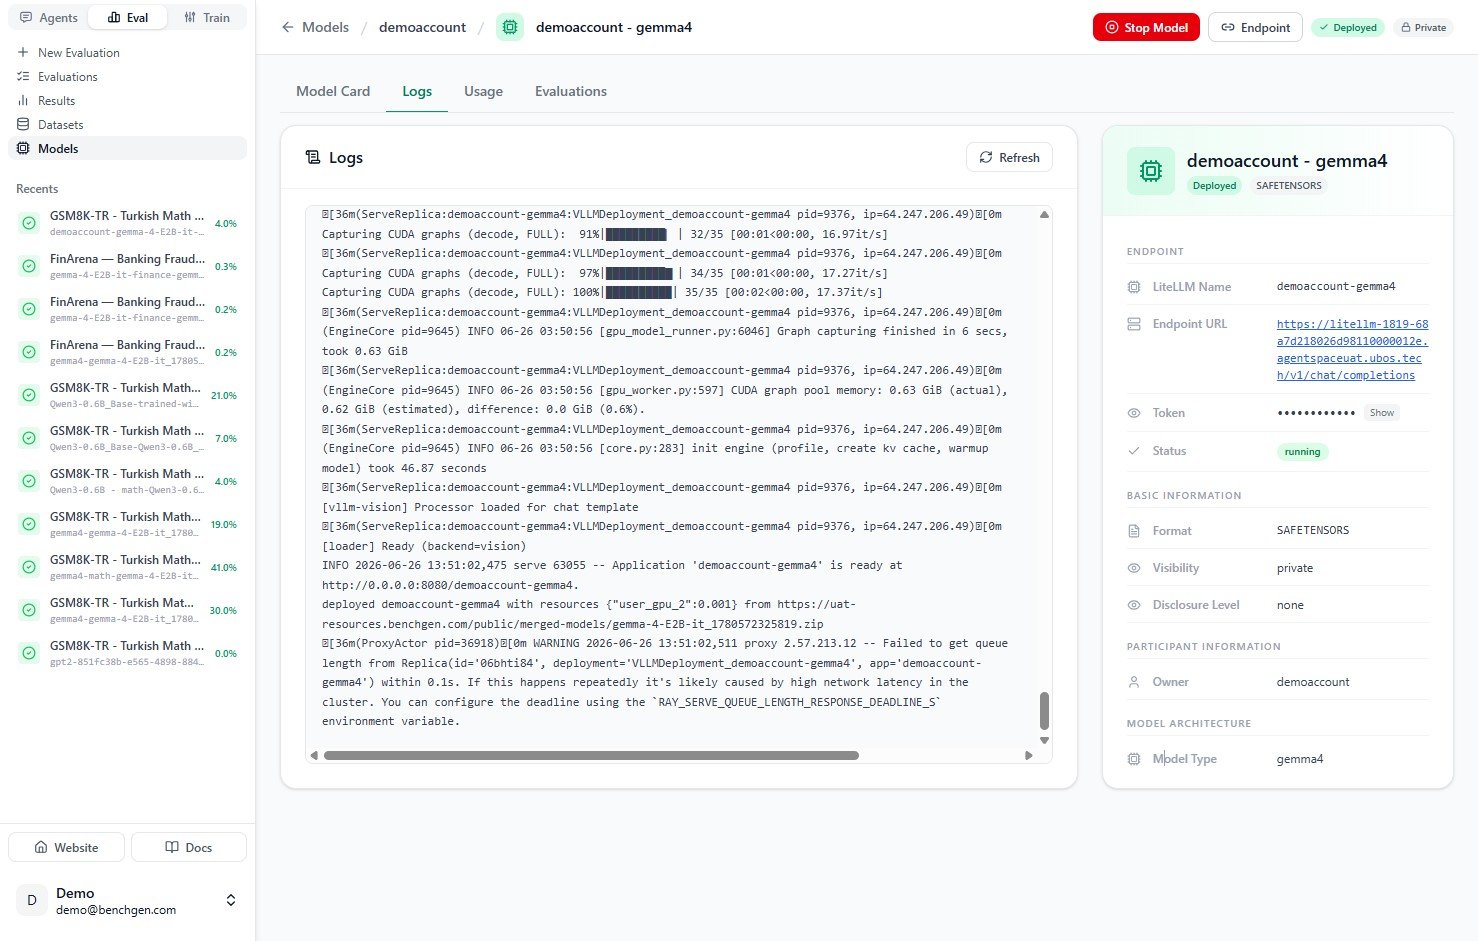 For the full deployment walkthrough, including the deployment logs and how to verify the model is serving, see [Deploy an inference model](/eval/run-an-inference-model).
***
## Send requests
Once the status is **running**, the endpoint is OpenAI-compatible. Use the **LiteLLM Name**, **Endpoint URL**, and **Token** from the model card:
```bash theme={null}
curl https:///v1/chat/completions \
-H "Authorization: Bearer " \
-H "Content-Type: application/json" \
-d '{
"model": "",
"messages": [
{"role": "user", "content": "Your test prompt here"}
],
"max_tokens": 256
}'
```
***
## Next Steps
* [Monitor model usage](/eval/monitor-model-usage) to track requests, tokens, and latency.
* [Evaluate an inference model](/eval/evaluate-a-running-model) to benchmark it against an environment.
* [Run a benchmark](/eval/run-a-benchmark) to measure improvement formally.
For the full deployment walkthrough, including the deployment logs and how to verify the model is serving, see [Deploy an inference model](/eval/run-an-inference-model).
***
## Send requests
Once the status is **running**, the endpoint is OpenAI-compatible. Use the **LiteLLM Name**, **Endpoint URL**, and **Token** from the model card:
```bash theme={null}
curl https:///v1/chat/completions \
-H "Authorization: Bearer " \
-H "Content-Type: application/json" \
-d '{
"model": "",
"messages": [
{"role": "user", "content": "Your test prompt here"}
],
"max_tokens": 256
}'
```
***
## Next Steps
* [Monitor model usage](/eval/monitor-model-usage) to track requests, tokens, and latency.
* [Evaluate an inference model](/eval/evaluate-a-running-model) to benchmark it against an environment.
* [Run a benchmark](/eval/run-a-benchmark) to measure improvement formally.