Before you can benchmark a model or call it from an agent, it needs to be running: loaded onto a GPU and exposed as a live inference endpoint. This page walks through deploying a model from the Eval Models area, watching it come online, and confirming it is ready to serve requests.
Run Inference here vs. in TrainThis page covers deploying a model as a persistent, OpenAI-compatible endpoint inside Eval. If you only want a quick chat sanity-check against a freshly trained adapter, use Train → Run Inference instead.
Prerequisites
- A model available in your workspace: uploaded weights, a model from Train, or a published model. See Add a model.
- At least one GPU node with free capacity in your environment.
Steps
1. Open the Models page
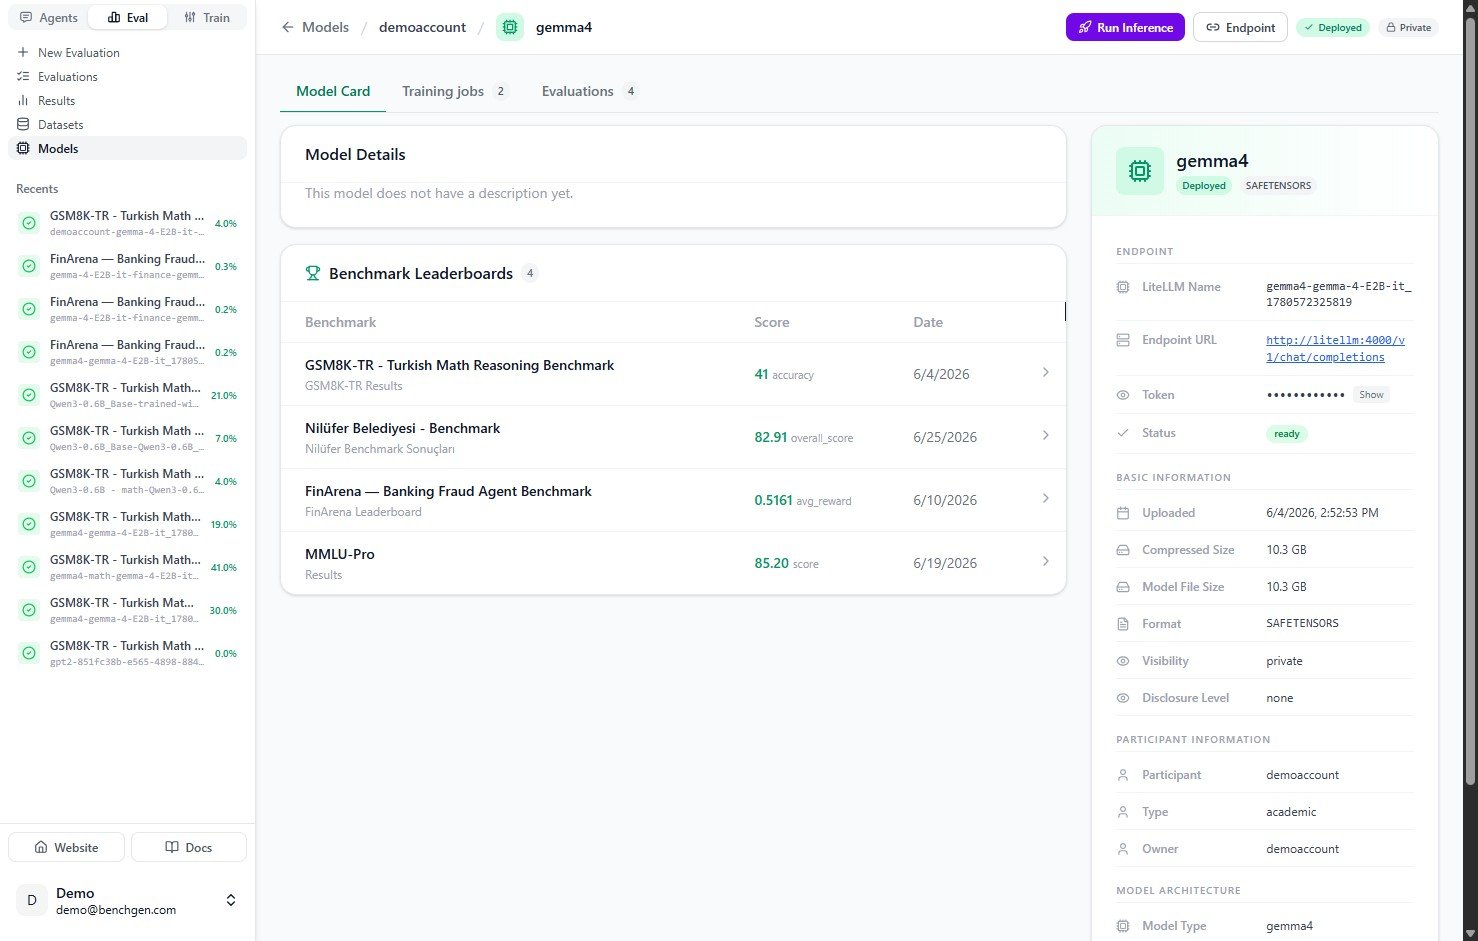
In the Eval tab, click Models in the left sidebar. The AI Models page lists every model in your workspace, both base models and deployed endpoints.
Use the filter chips (All, Running, Deployed, Base, Public) or the search box to find the model you want to deploy.

2. Open the model card
Click a model to open its Model Card. The card shows the model’s details, benchmark leaderboards, and, in the panel on the right, its endpoint and basic information.
To deploy it for inference, click Run Inference in the top right corner.
 The Run Inference dialog opens. At the top, the Will be served as line shows the identifier your endpoint will use, for example
 demoaccount/gemma4.
Pick a GPU from the dropdown, which lists nodes that still have free capacity such as 1/1 free, then review the inference configuration:
| Setting | Default | What it controls |
|---|
| GPU | | The GPU node the model is loaded onto. Only nodes with free capacity can be selected. |
| Max tokens | 512 | Maximum number of tokens generated per response. |
| Temperature | 0.7 | Sampling randomness. Lower values are more deterministic. |
| Top P | 0.95 | Nucleus sampling cutoff. |
| Context length | 4096 | Maximum tokens (prompt plus response) the model keeps in context. |
| Precision | auto | Numeric precision for the weights. auto lets BenchGen pick the best option for the selected GPU. |
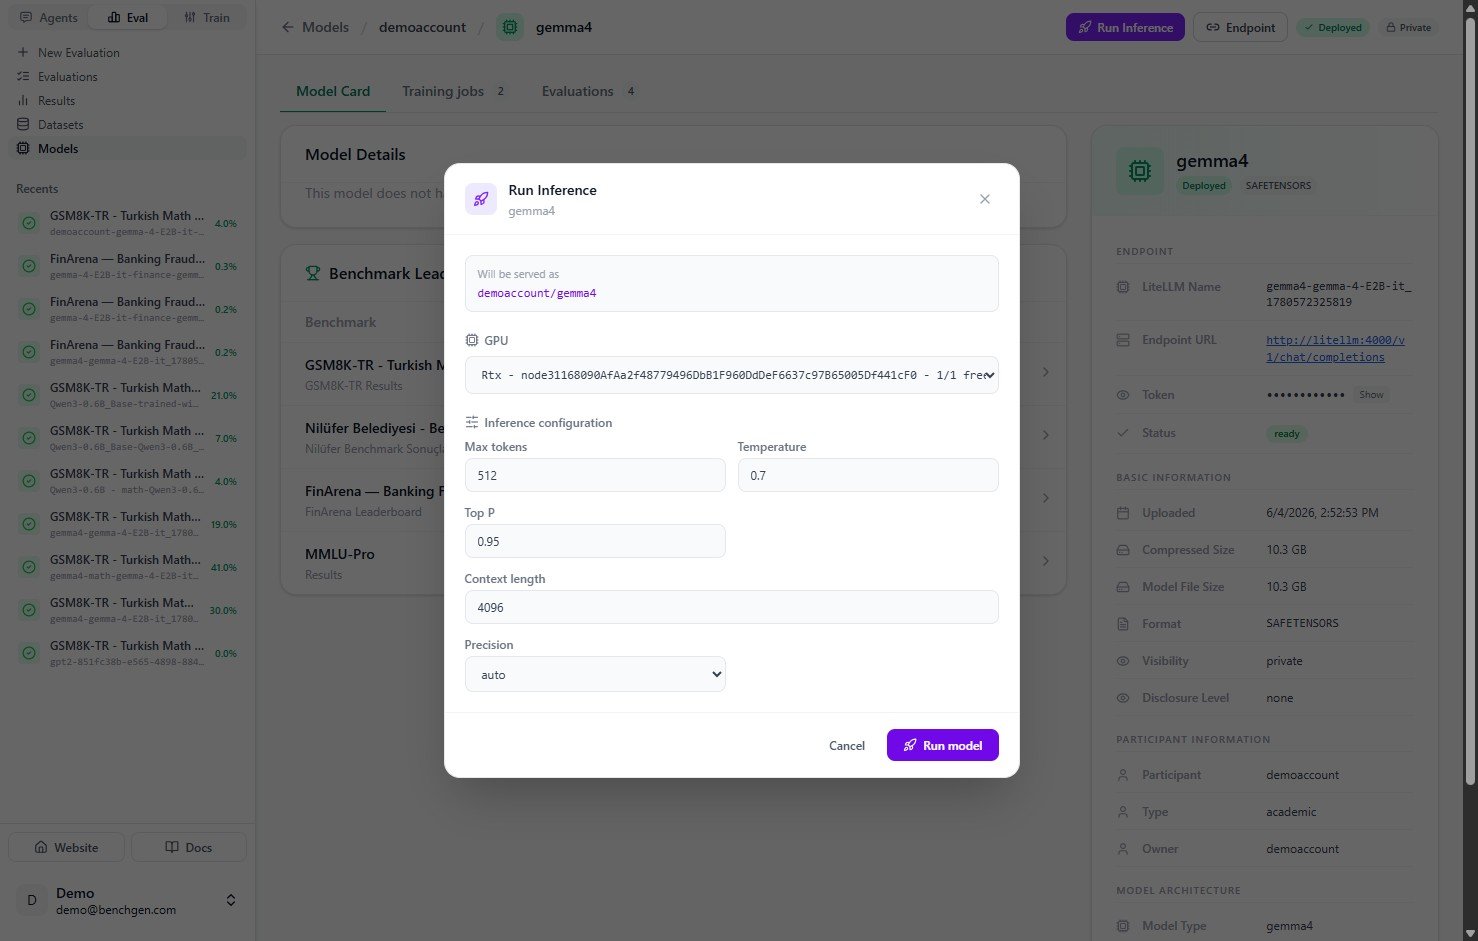
The defaults are a good starting point. For benchmarks that expect long answers, like detailed reasoning or code, raise Max tokens and Context length. For deterministic scoring, lower Temperature.
4. Monitor deployment status
After you click Run model, the model begins deploying. A banner reads “Deploying… the model is starting up”, the status badge switches to Deploying, and a Stop Model button appears in the top right.
The panel on the right updates with the new endpoint details: its LiteLLM Name, Endpoint URL, access Token, and a Status of deploying. New Logs and Usage tabs also appear. The Usage tab is where you track requests, tokens, and latency once the model is serving traffic. See Monitor model usage.

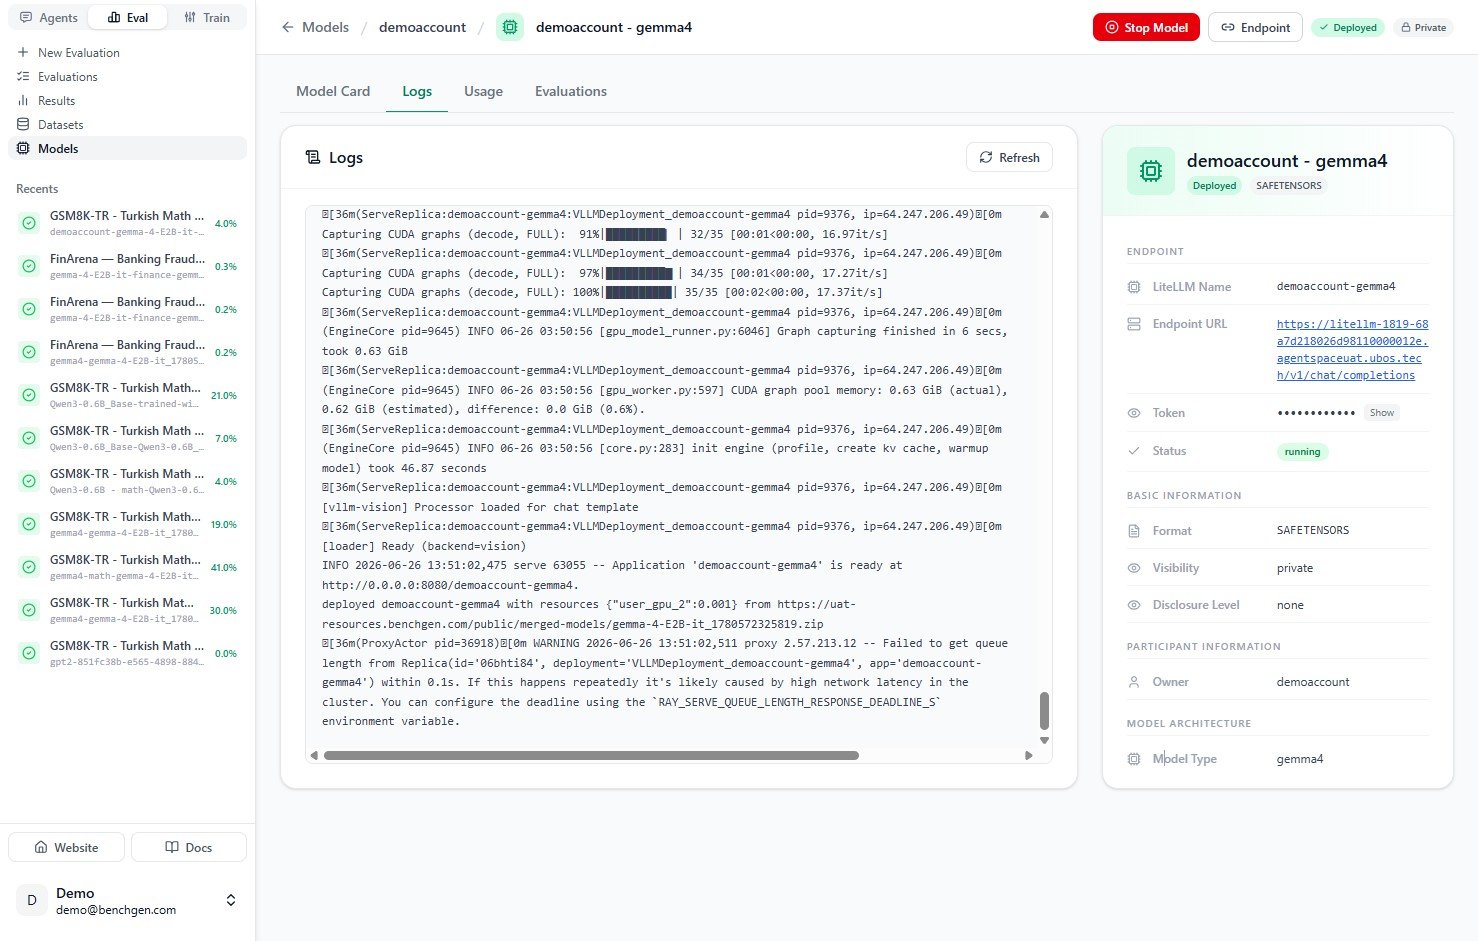
5. Inspect the deployment logs
Open the Logs tab to watch the deployment in real time. The logs stream the runtime setup as the Ray cluster connects, the serve application starts, and the model weights load.
 Loading can take a minute or two depending on model size. Click Refresh if you want to pull the latest lines manually.
6. Verify the model is running
When startup finishes, the logs report that the application is ready. For example:
INFO Application 'demoaccount-gemma4' is ready at http://0.0.0.0:8080/demoaccount-gemma4.
 Back on the Models page, the model now appears under a Running section, and the Running filter count goes up by one.

Accessing the inference endpoint
Once the model is running, the panel on the right of the model card gives you everything you need to call it:
| Field | What it is |
|---|
| LiteLLM Name | The model identifier you pass in the model field of your request body. |
| Endpoint URL | The OpenAI-compatible base URL (ends in /v1/chat/completions). |
| Token | The bearer token for authentication. Click Show to reveal it. |
| Status | Must read running before the endpoint accepts requests. |
curl request:
curl https://<your-endpoint-url>/v1/chat/completions \
  -H "Authorization: Bearer <YOUR_TOKEN>" \
  -H "Content-Type: application/json" \
  -d '{
    "model": "demoaccount-gemma4",
    "messages": [
      {"role": "user", "content": "Solve: 12 x 8 = ?"}
    ],
    "max_tokens": 256
  }'
A running model holds a GPU for as long as it stays deployed. When you’re done, open the model card and click Stop Model to free the resources.
Next Steps