

.zip, the same flow whether you start it from Eval’s Models page or from Train. It’s the same Add Model screen either way, so the steps below walk it end to end, focused on the File tab rather than the HuggingFace search tab.
Step 1: Open Models and click Add Model
In the left sidebar, click Models, then + Add Model in the top right.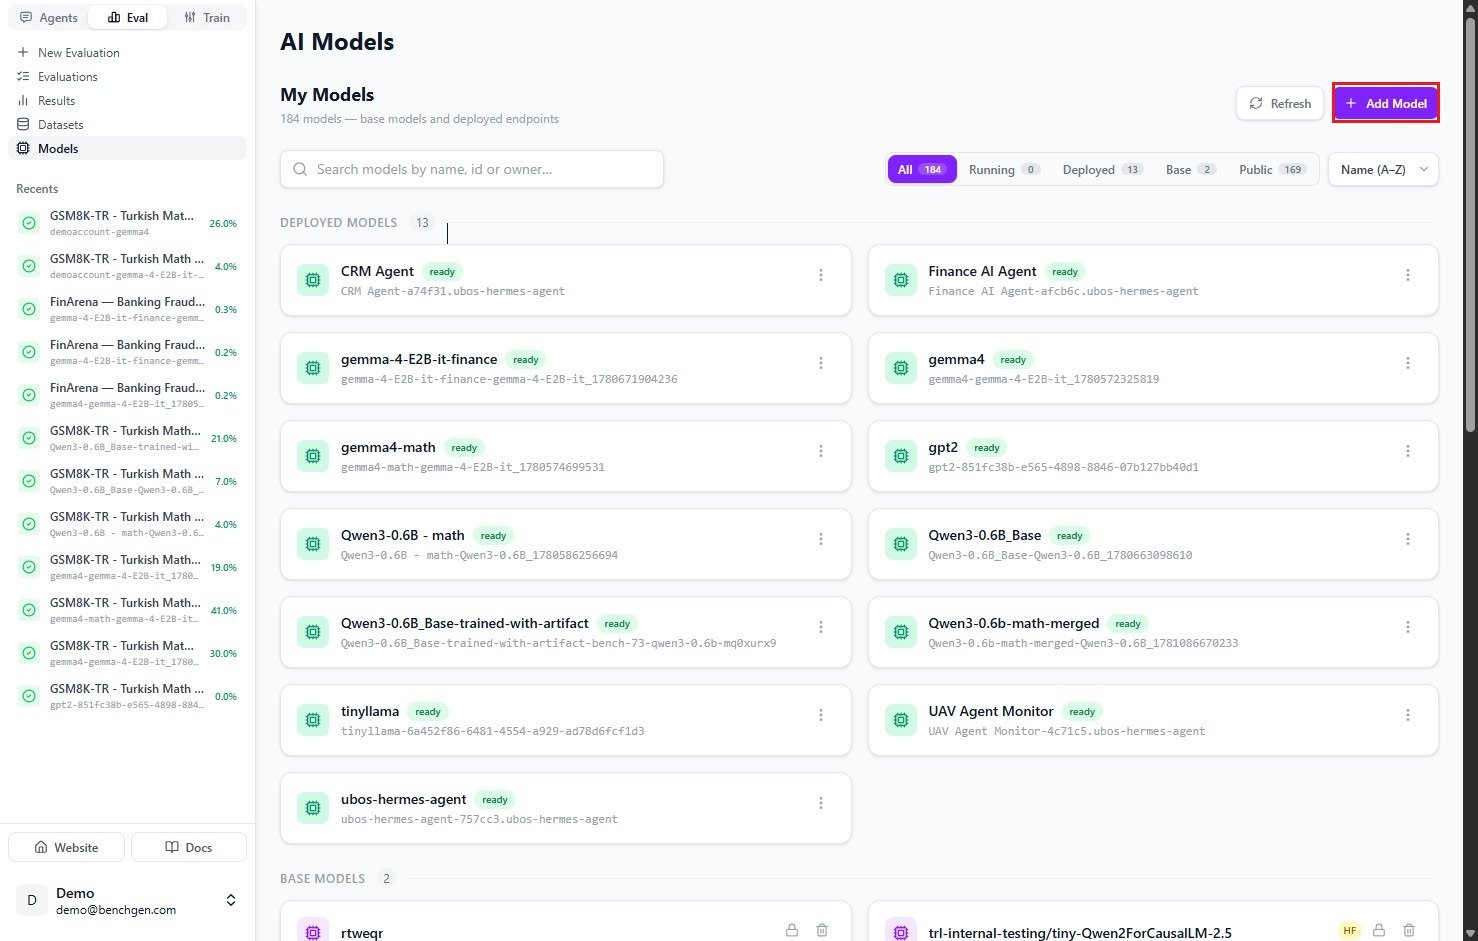
The AI Models page, with Add Model in the top right
Step 2: Name the model
Give it a name and, optionally, a short description, then click Add Model to continue.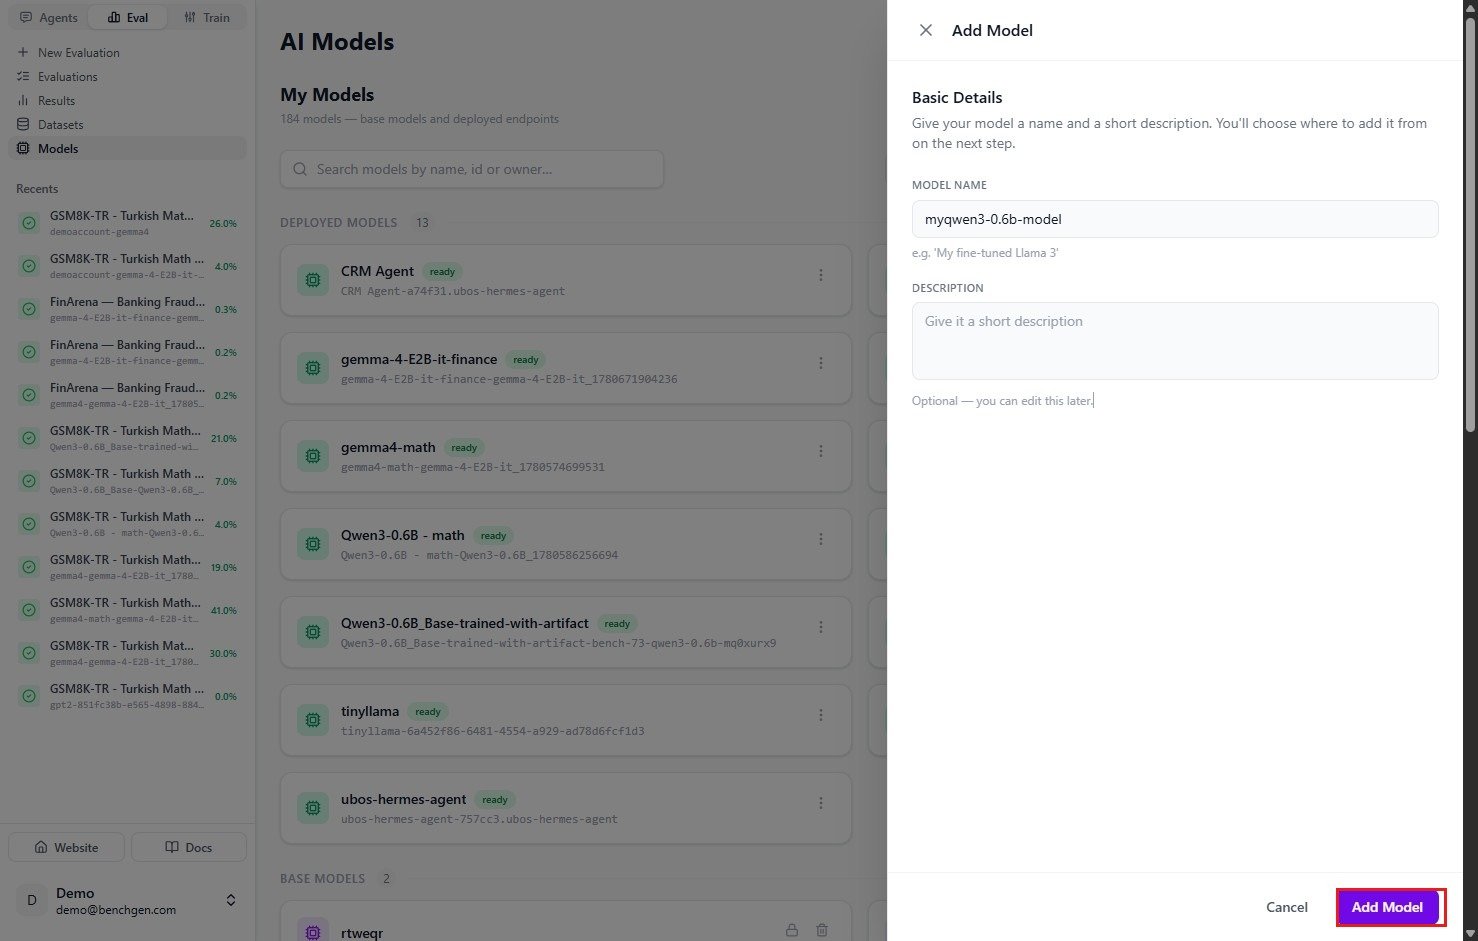
The Add Model panel: name and description, before you've picked a source
Step 3: Upload the archive on the File tab
The model card opens on an Add Model card with two tabs, File and HF model. Stay on File: drag and drop your.zip onto the dashed area, or click Browse Files.
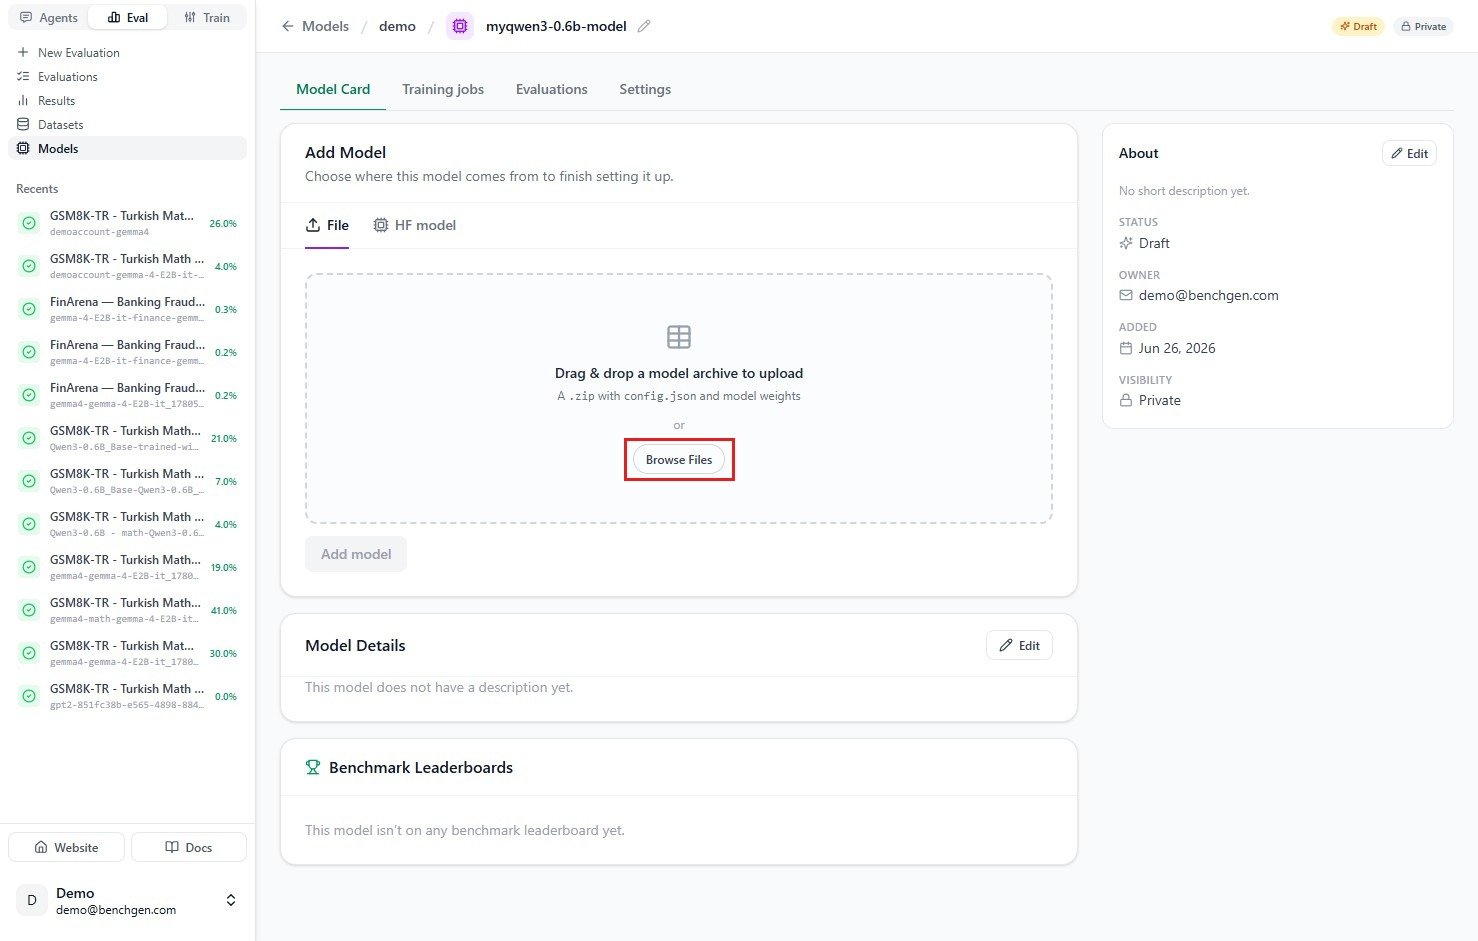
The File tab: drag-and-drop area for a model archive, with Browse Files as the alternative
What has to be inside the zip
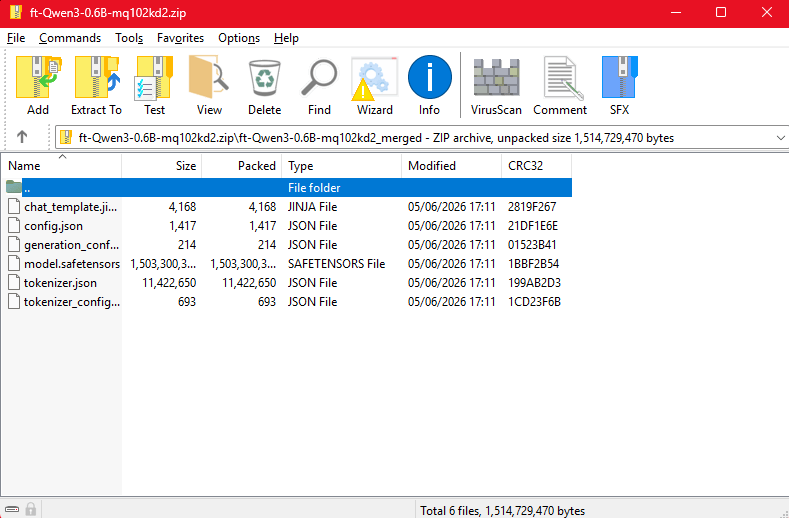
A merged model's zip contents, viewed on Windows: config.json, model.safetensors, and the tokenizer files, no subfolder
Which HuggingFace models you can and can’t use
If you want a smaller memory footprint during training, use the training job’s own Quantization option (QLoRA-style), not a pre-quantized checkpoint downloaded from the Hub.
A short model catalog to start from
Open-weight, instruction-tuned models that are known to work well as fine-tuning bases:Step 4: Confirm the model is ready
Once the upload finishes, BenchGen registers the model and provisions its endpoint. The status flips from Draft to ready, and the model card fills in its model name, Endpoint URL, access Token, and format (for example SAFETENSORS).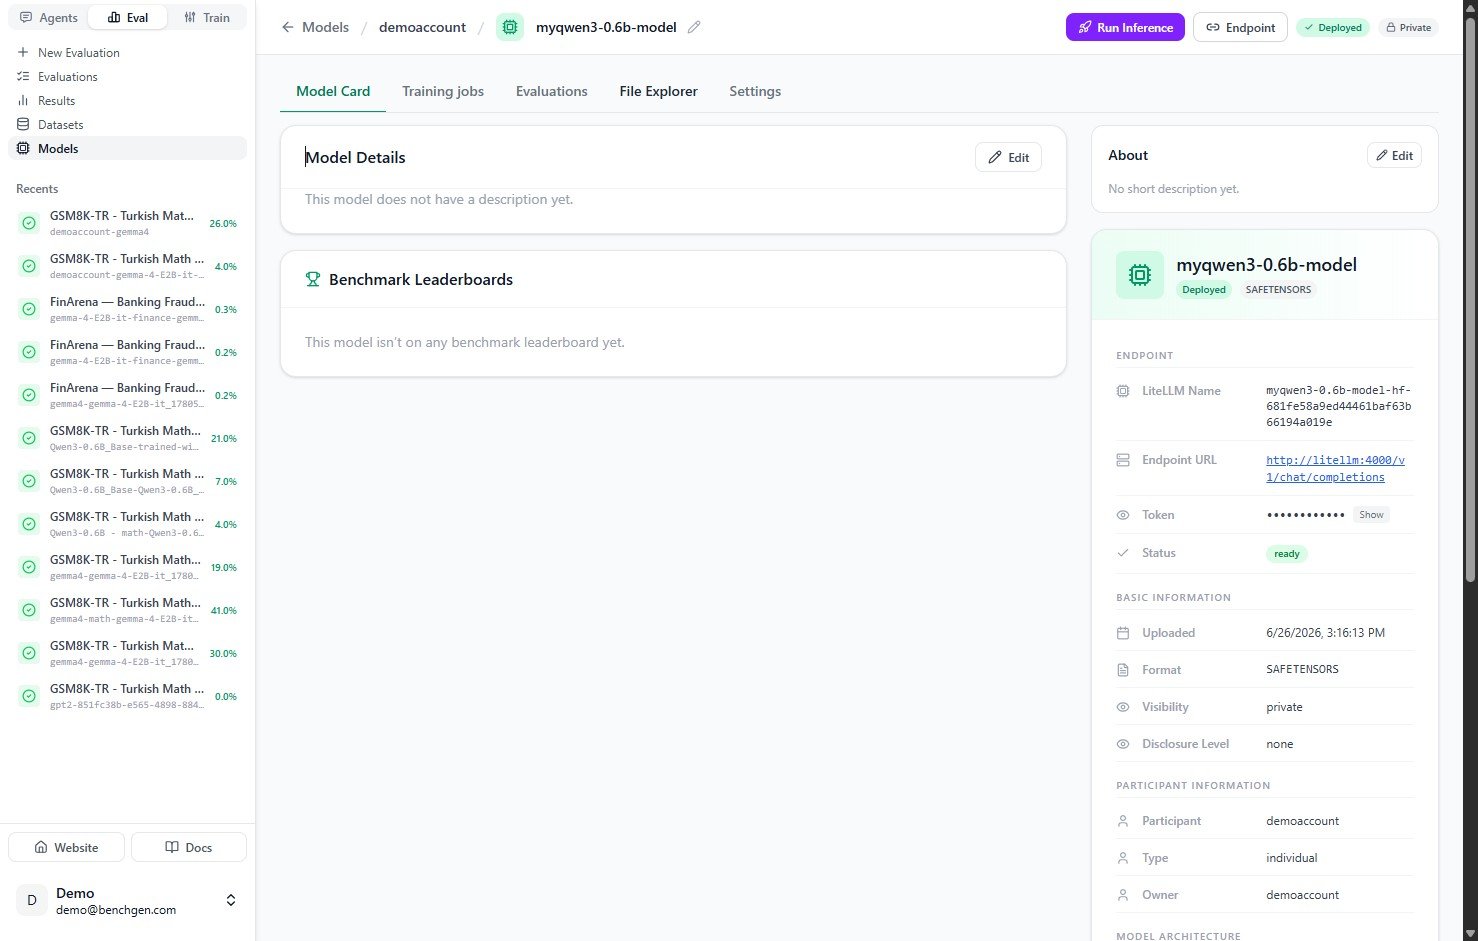
A registered model, ready, showing its endpoint details and format
Next Steps
Fine-tune a Model
Pick this model as your base and configure the run.
Add a Model
The same Add Model flow, covering the HuggingFace import path too.