

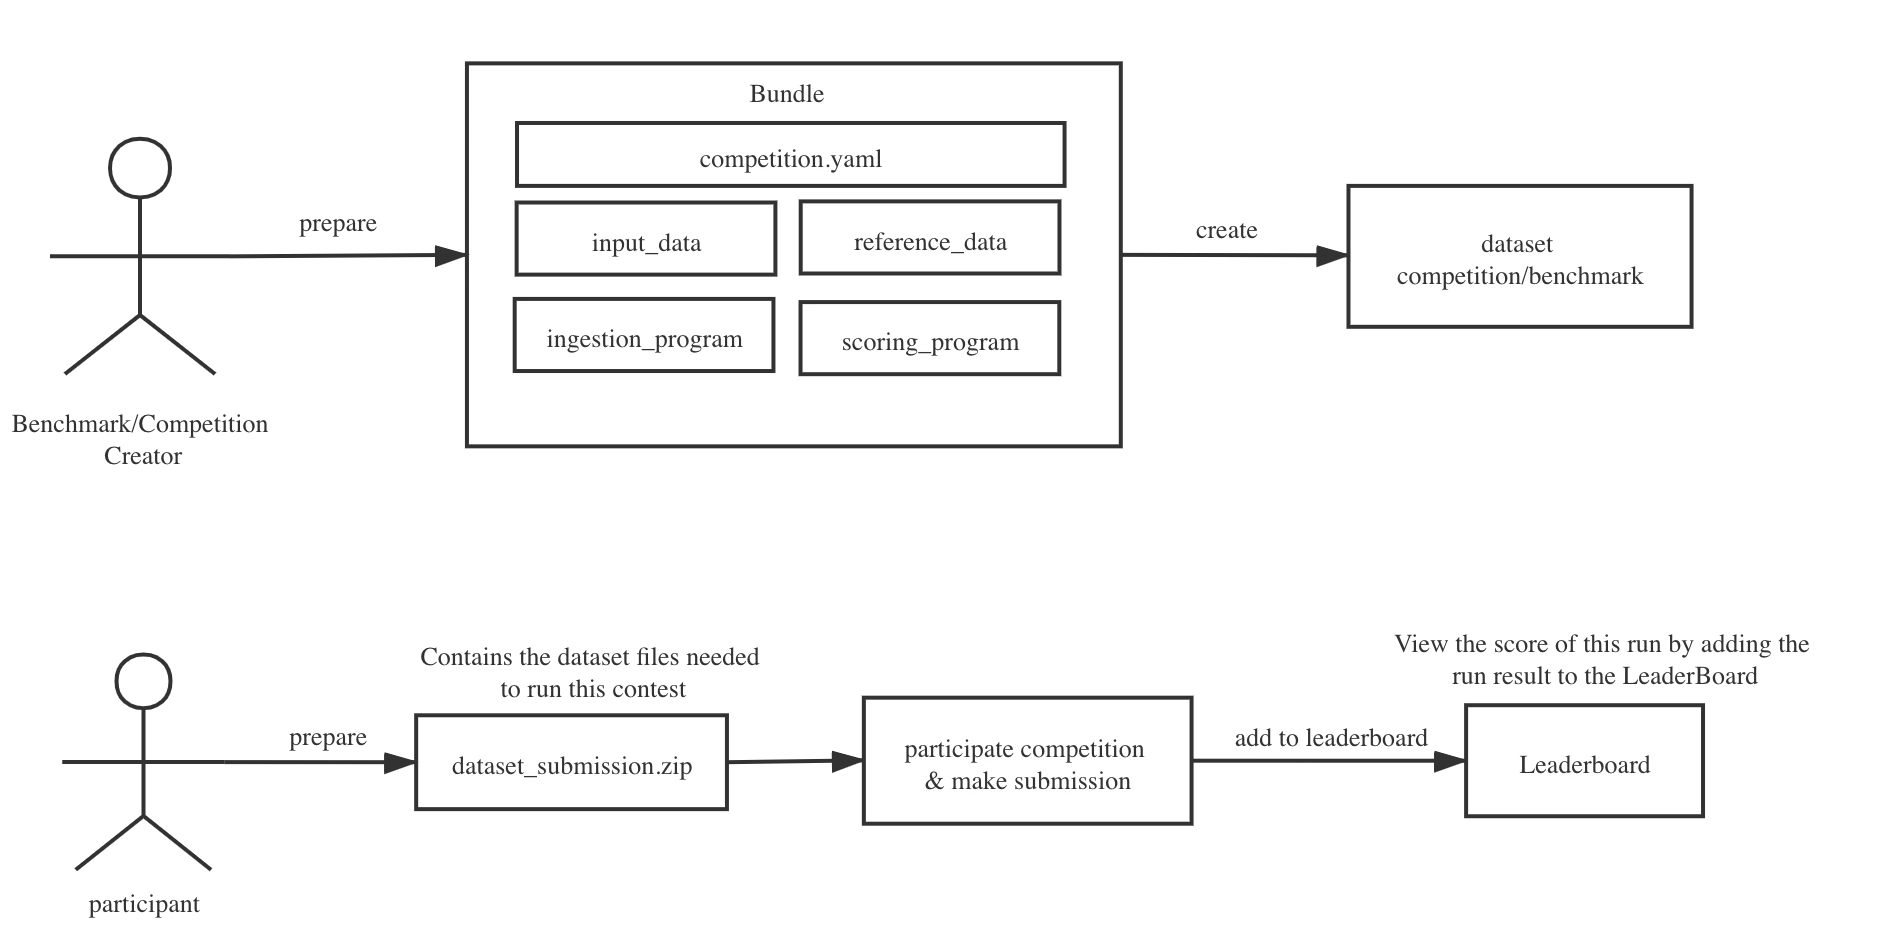
Bundle creation and submission overview
What you need
A custom environment is packaged as a.zip bundle. At minimum you need:
See Bundle structure for a full explanation of each file and YAML reference for every field in
competition.yaml.
Steps
-
Prepare your data. Collect the test cases you want to evaluate against. Package your ground-truth answers into a
reference_data.zip. -
Write a scoring program. Create a script that reads a model’s predictions and compares them to your reference data. The script must write a
scores.jsonfile with one numeric value per leaderboard column you want to display.Package the script and ametadata.yaml(specifying the run command) into ascoring_program.zip. - (Optional) Write an ingestion program. If BenchGen needs to run your model end-to-end rather than just receive its outputs, write an ingestion program that takes the input data, runs the model, and writes predictions to the output directory. Package it the same way as the scoring program.
-
Write your
competition.yaml. This file wires everything together. It declares the title, tasks, which data files to use, and how to display the leaderboard. See the YAML reference for all available fields. -
Assemble the bundle. Put all files into a single
.zip. Thecompetition.yamlmust be at the root level. -
Upload to BenchGen. Go to Environments → New environment → Upload bundle, drop in your
.zip, and click Create. BenchGen validates the structure and registers the environment in your workspace immediately.
After uploading
Your environment appears in your workspace’s environment list. You can:- Run it against any model from Eval → Run
- Share it with your team so others can use it in their runs
- Update it by uploading a revised bundle — previous runs keep a snapshot of the version they used
Next steps
Bundle Structure
Detailed breakdown of every file in the
.zip.YAML Reference
Every field in
competition.yaml explained.On a Platform Model
Run your new environment against a model.