

How to Create a Topic
This step-by-step guide will help you add a new topic to one of your agents in Agentspace. Each step is illustrated with real screenshots for clarity.What Is a TopicA Topic represents a defined job, capability, or “problem space” your agent is authorized to handle end‑to‑end. Think of it as a focused mini playbook: it tells the agent when to engage (classification), what it’s allowed to do (scope + actions), and how to behave (instructions + tone + guard rails). Collectively, all topics assigned to an agent = its skill set.Topics work together with Actions:
- Topic = framed intent domain (Reservation Cancellation, Password Reset, Order Tracking…)
- Actions = executable tools or procedures the agent can call inside that domain
- Improve intent routing accuracy (less confusion between similar requests)
- Reduce hallucinations (the agent knows what’s out‑of‑scope)
- Simplify auditing & iteration (each topic is a contained artifact)
- Enable reuse (drop a proven topic into another agent)
For deeper conceptual detail see: What is a Topic
Core Parts of a Topic
When to Create vs Reuse
Create a new Topic if:- The intent category isn’t covered without overloading an existing Topic’s scope.
- The policy / decision rules differ materially (would require many conditional instructions otherwise).
- Auditing or metrics need a separate lens (e.g., track cancellations separate from general booking changes).
- User phrasing & decision logic mostly overlap.
- Only an additional Action or narrow instruction tweak is required.
Create Your Own Topic
-
Open My Agents & Select an Agent
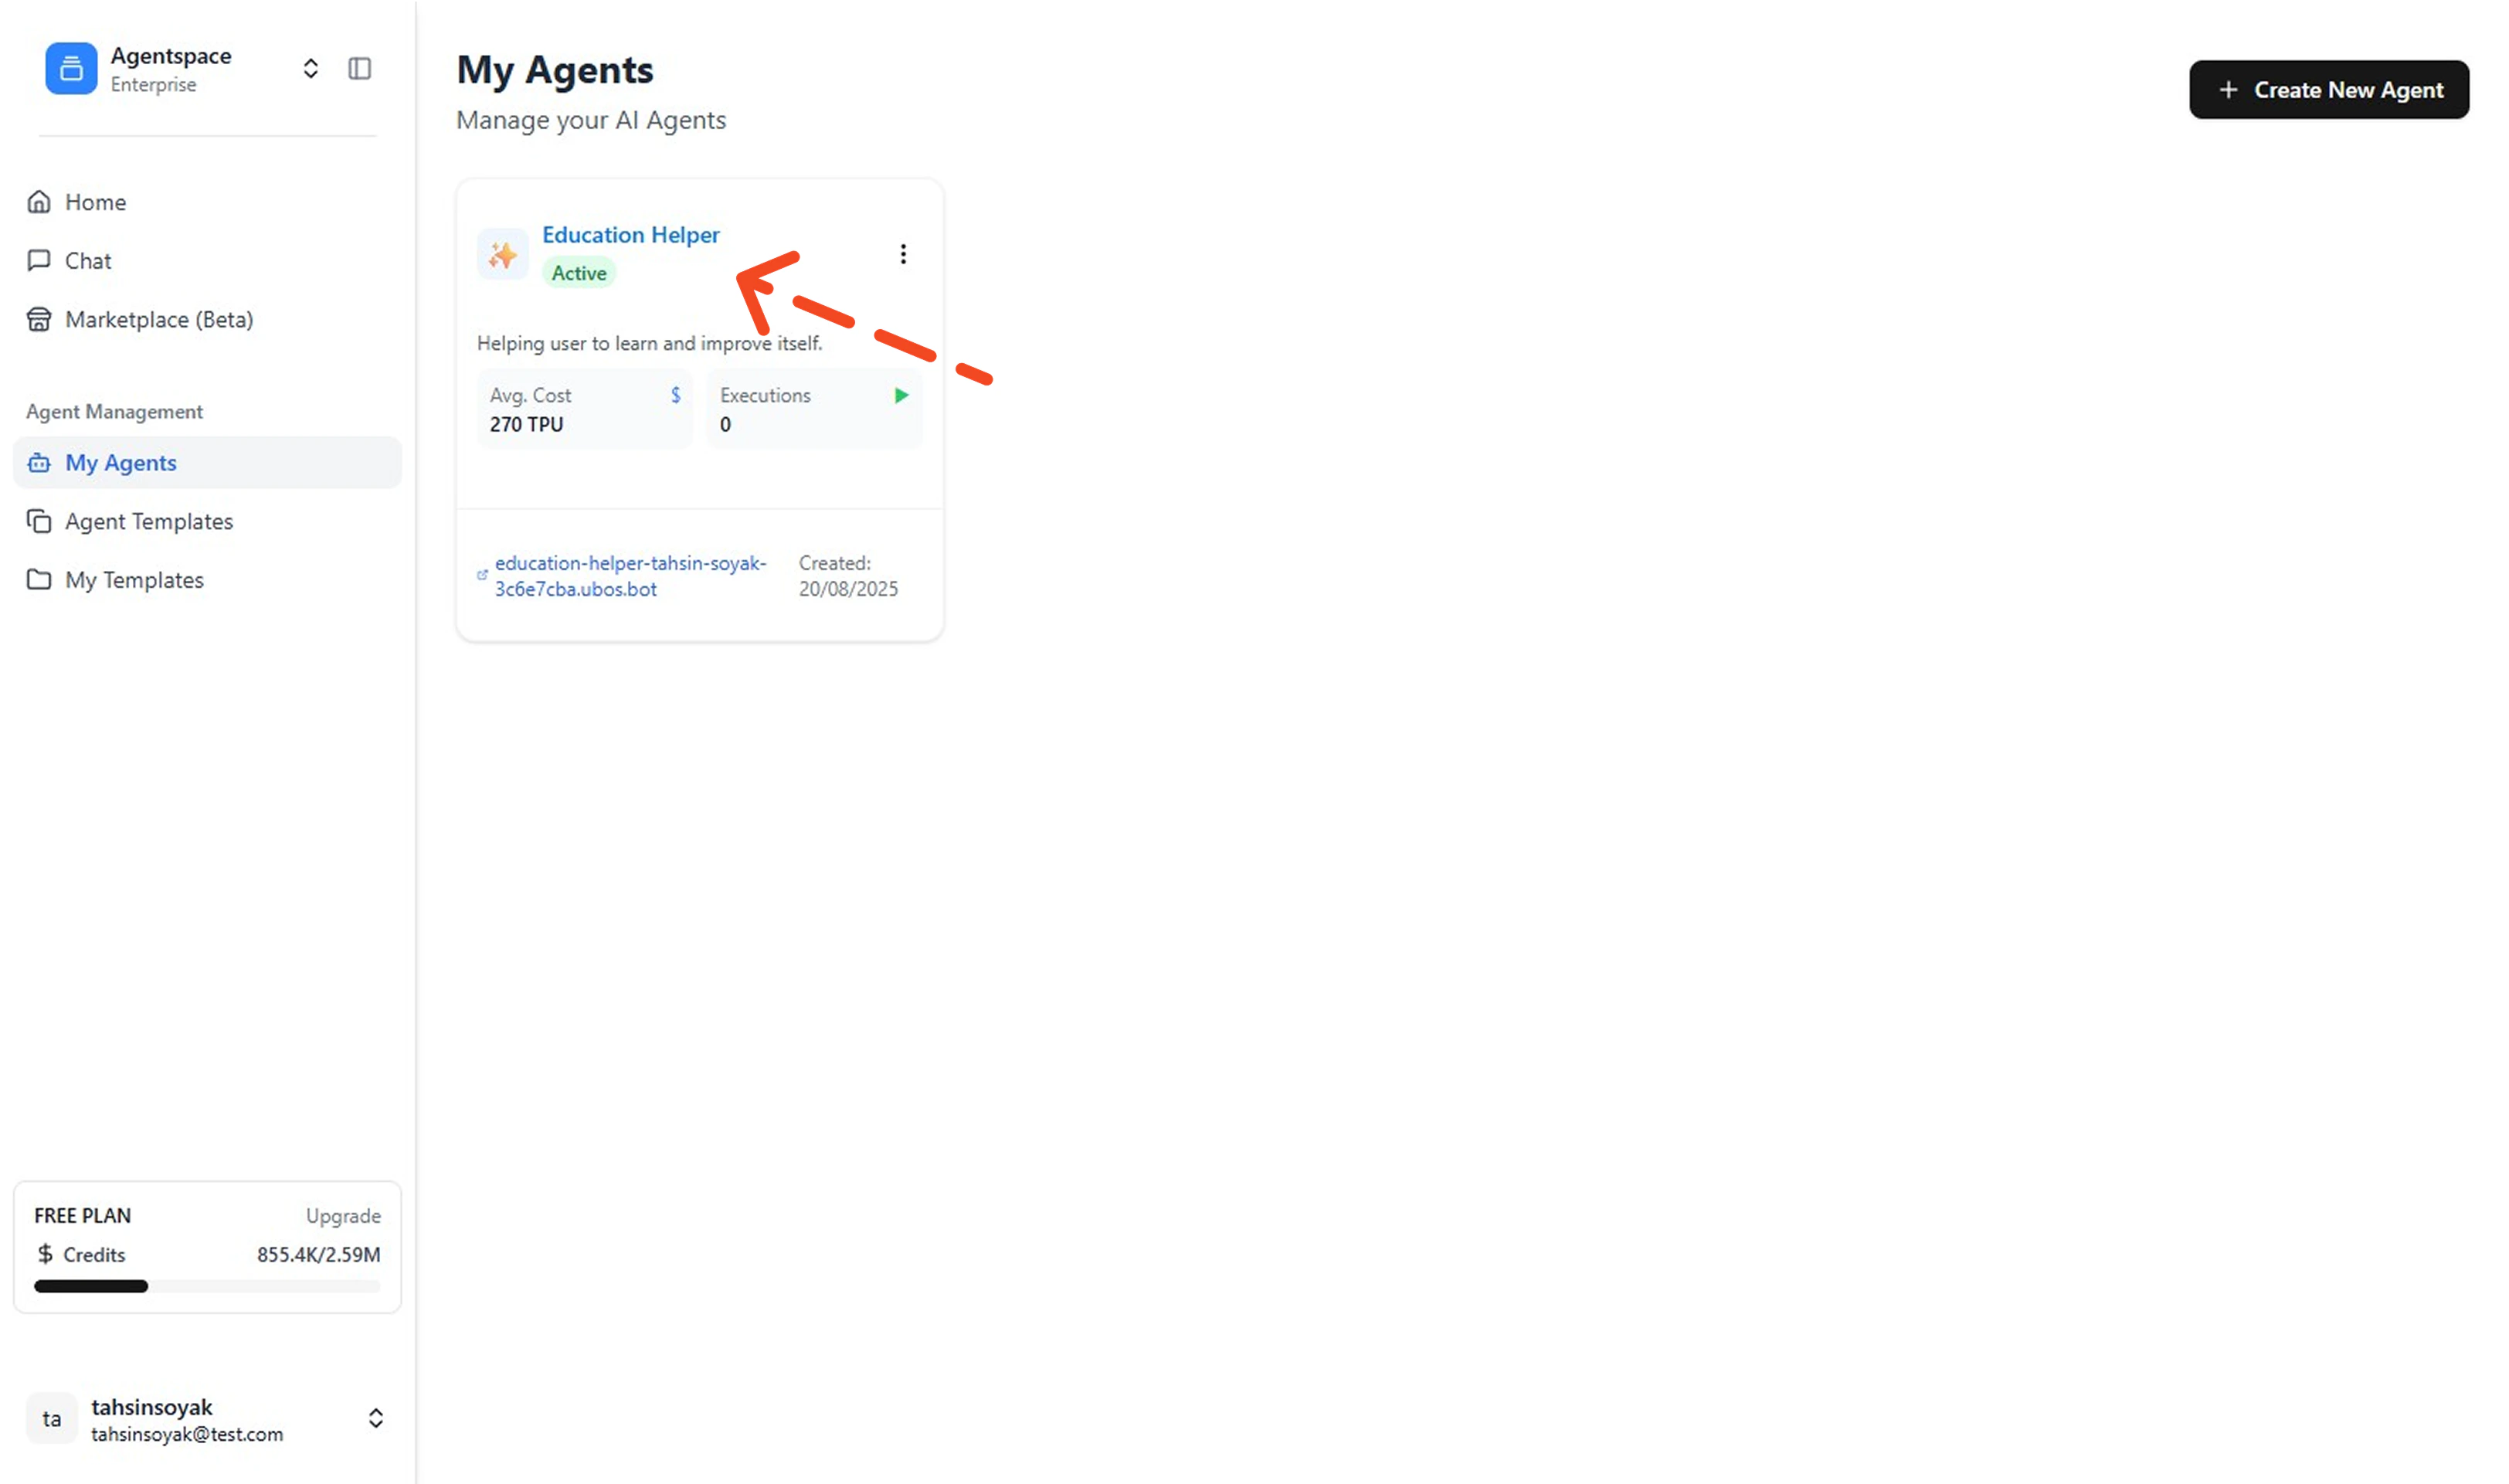
Go to your Left Menu and click My Agents. Then click the agent you want to add a topic to (opens its details).
Agent Details
-
Open the Topics Tab
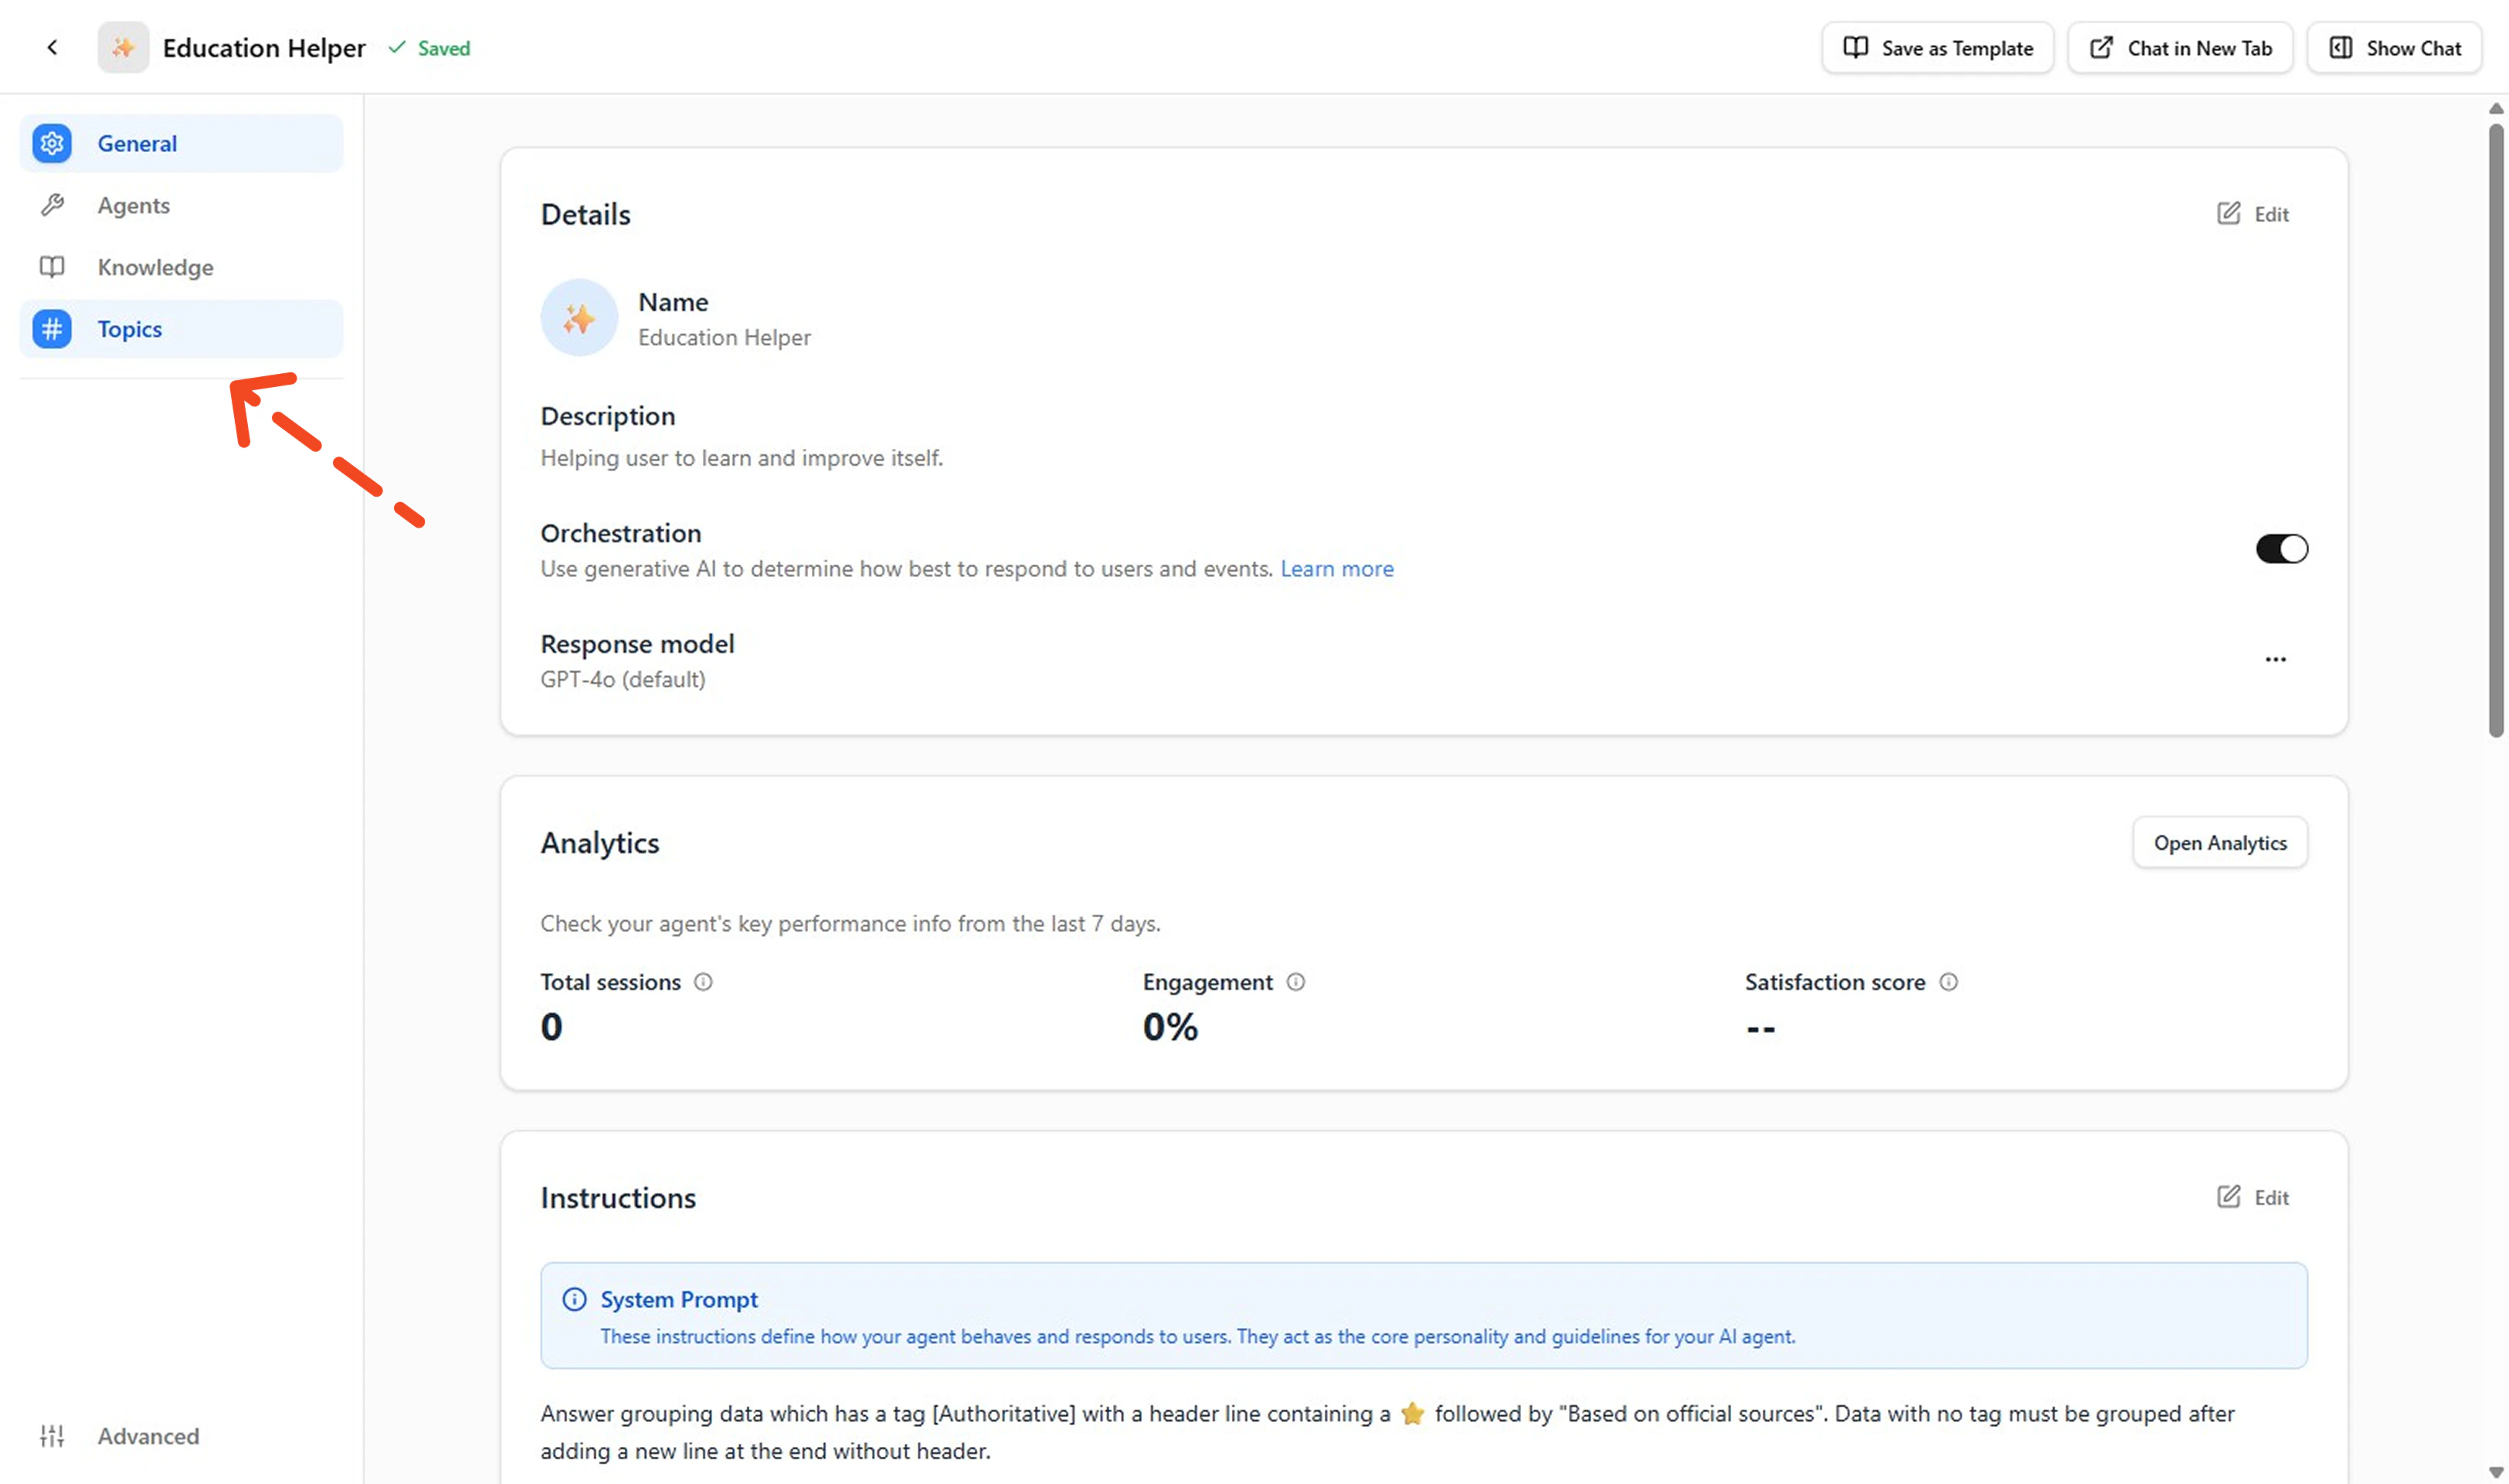
In the agent’s left menu, click Topics to view existing topics.
Topics List
-
Click Create New Topic
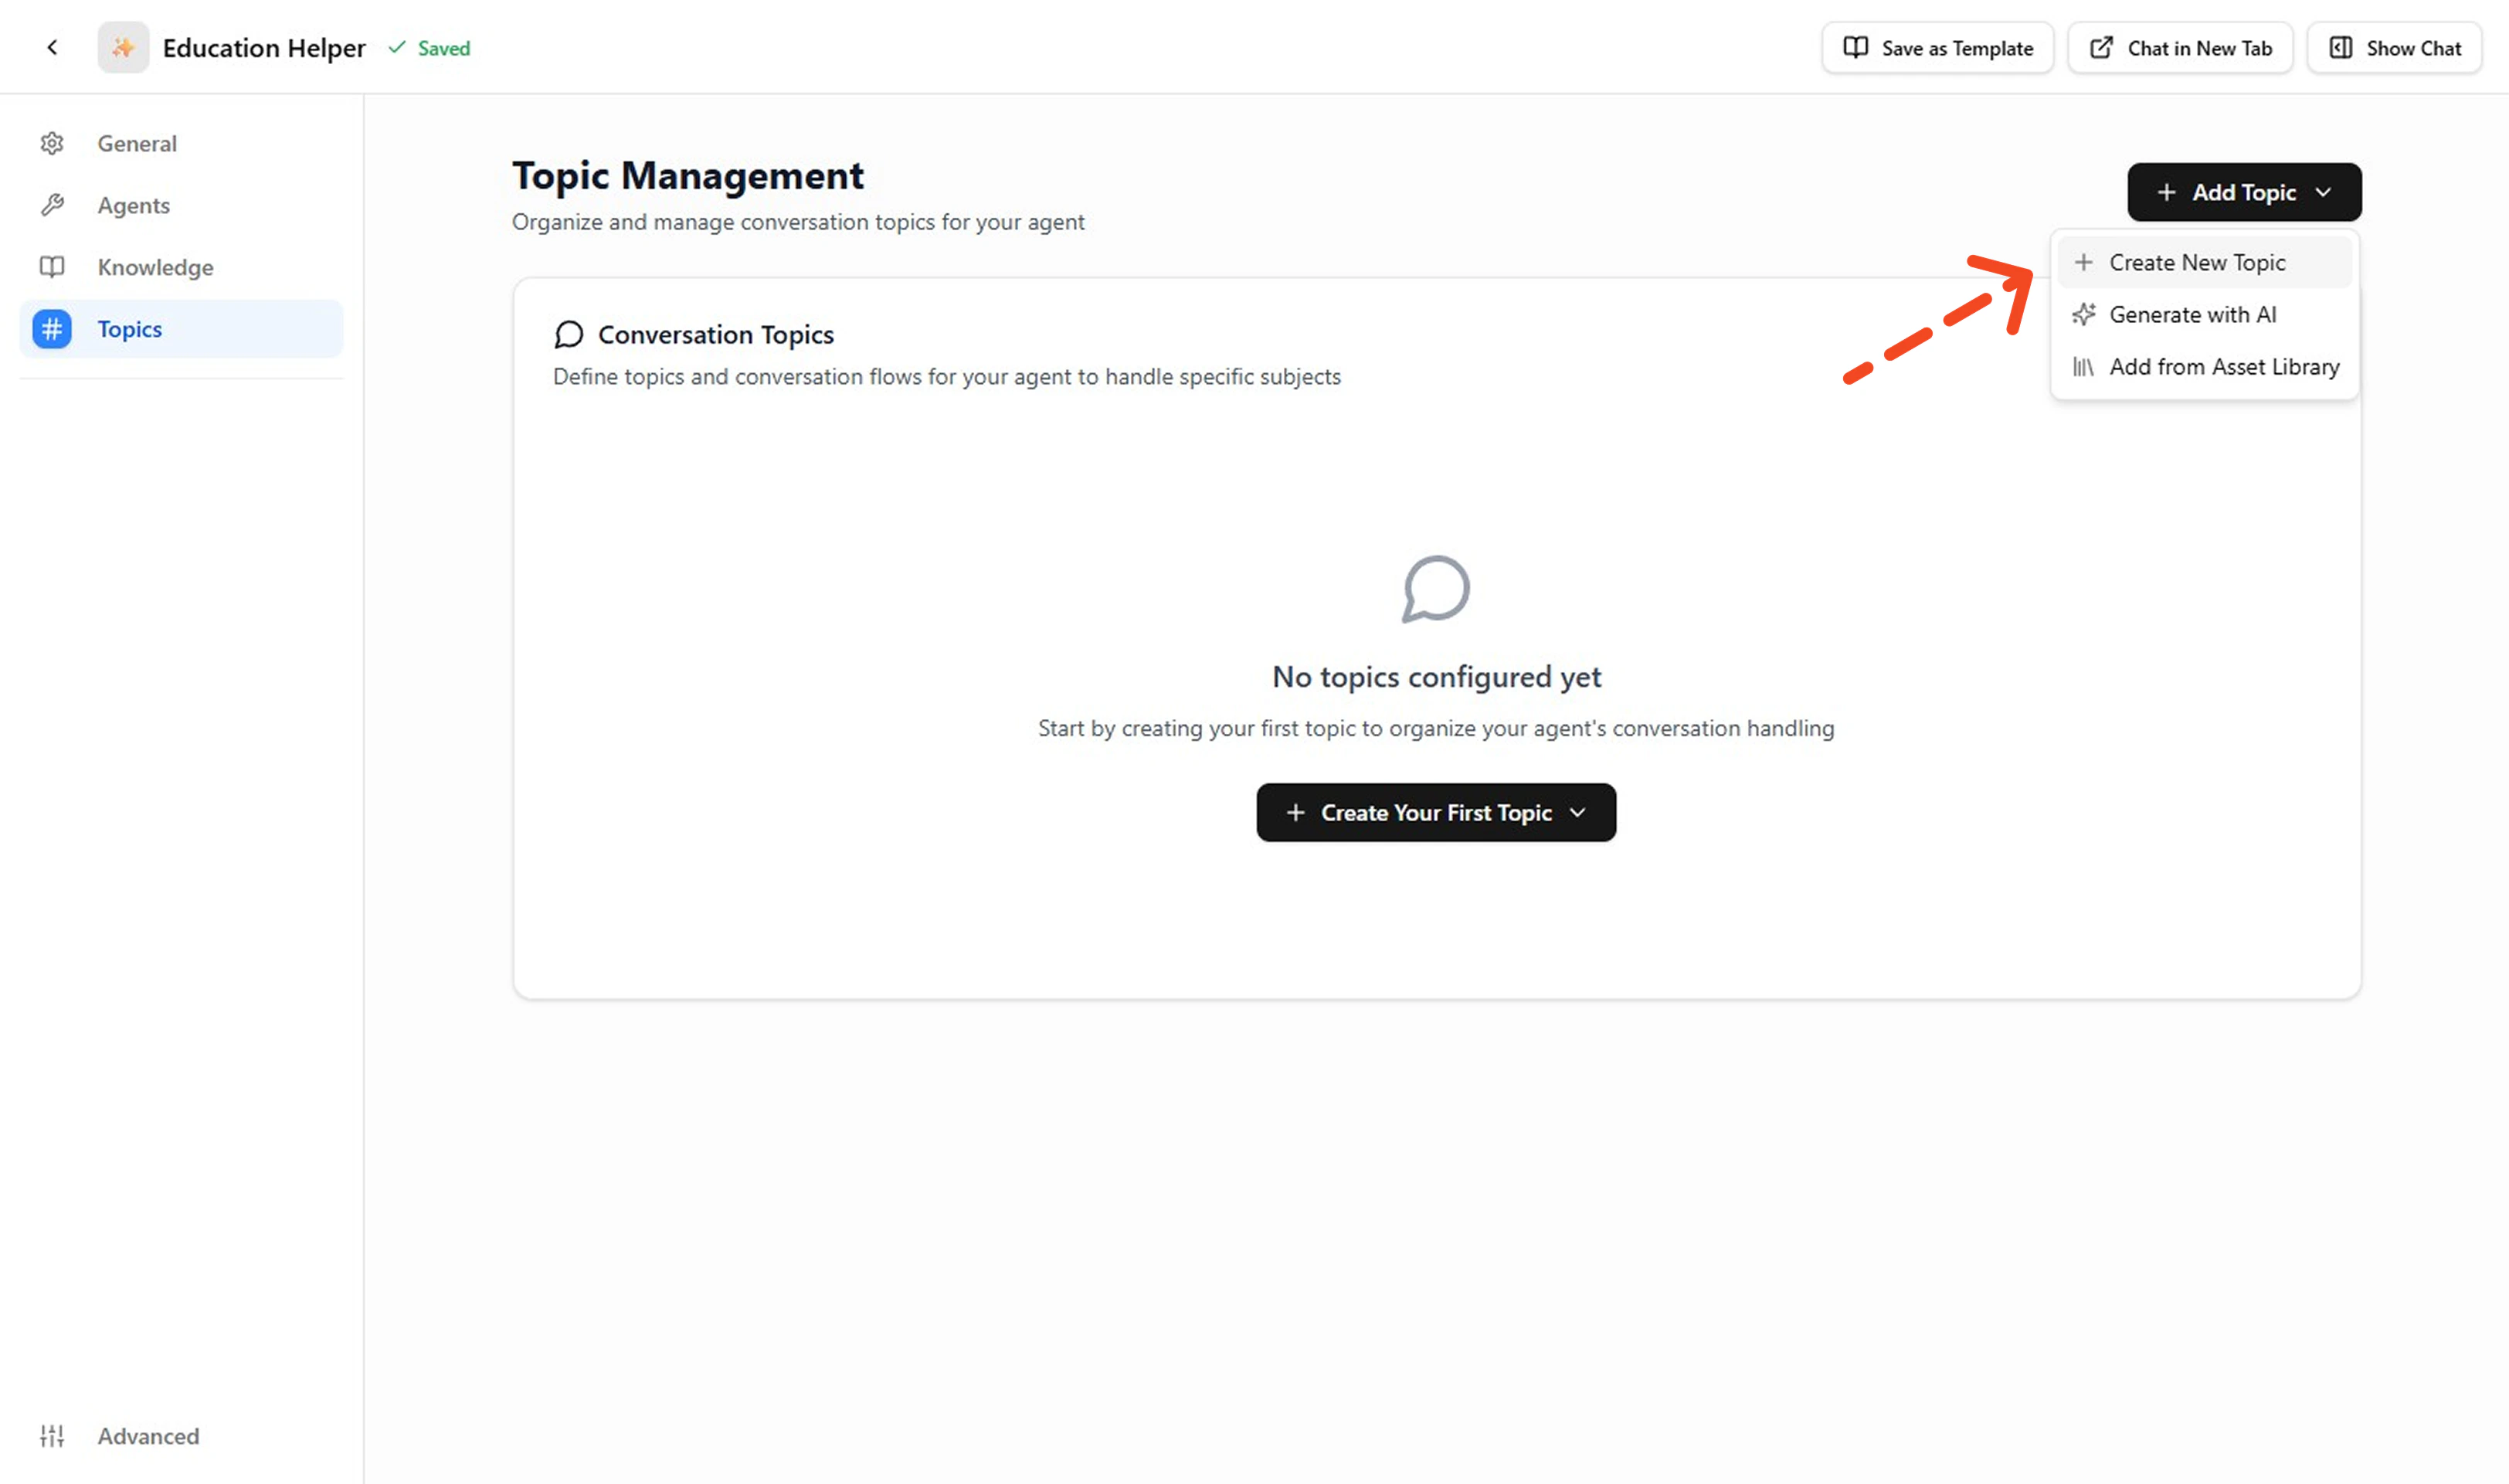
On the Topics page, click + Add Topic to open the dropdown and select + Create New Topic to open the topic creation form.
Create New Topic Button
Need AI assistance? See: Create with AI below for prompt patterns and validation tips.
-
Fill Topic Details
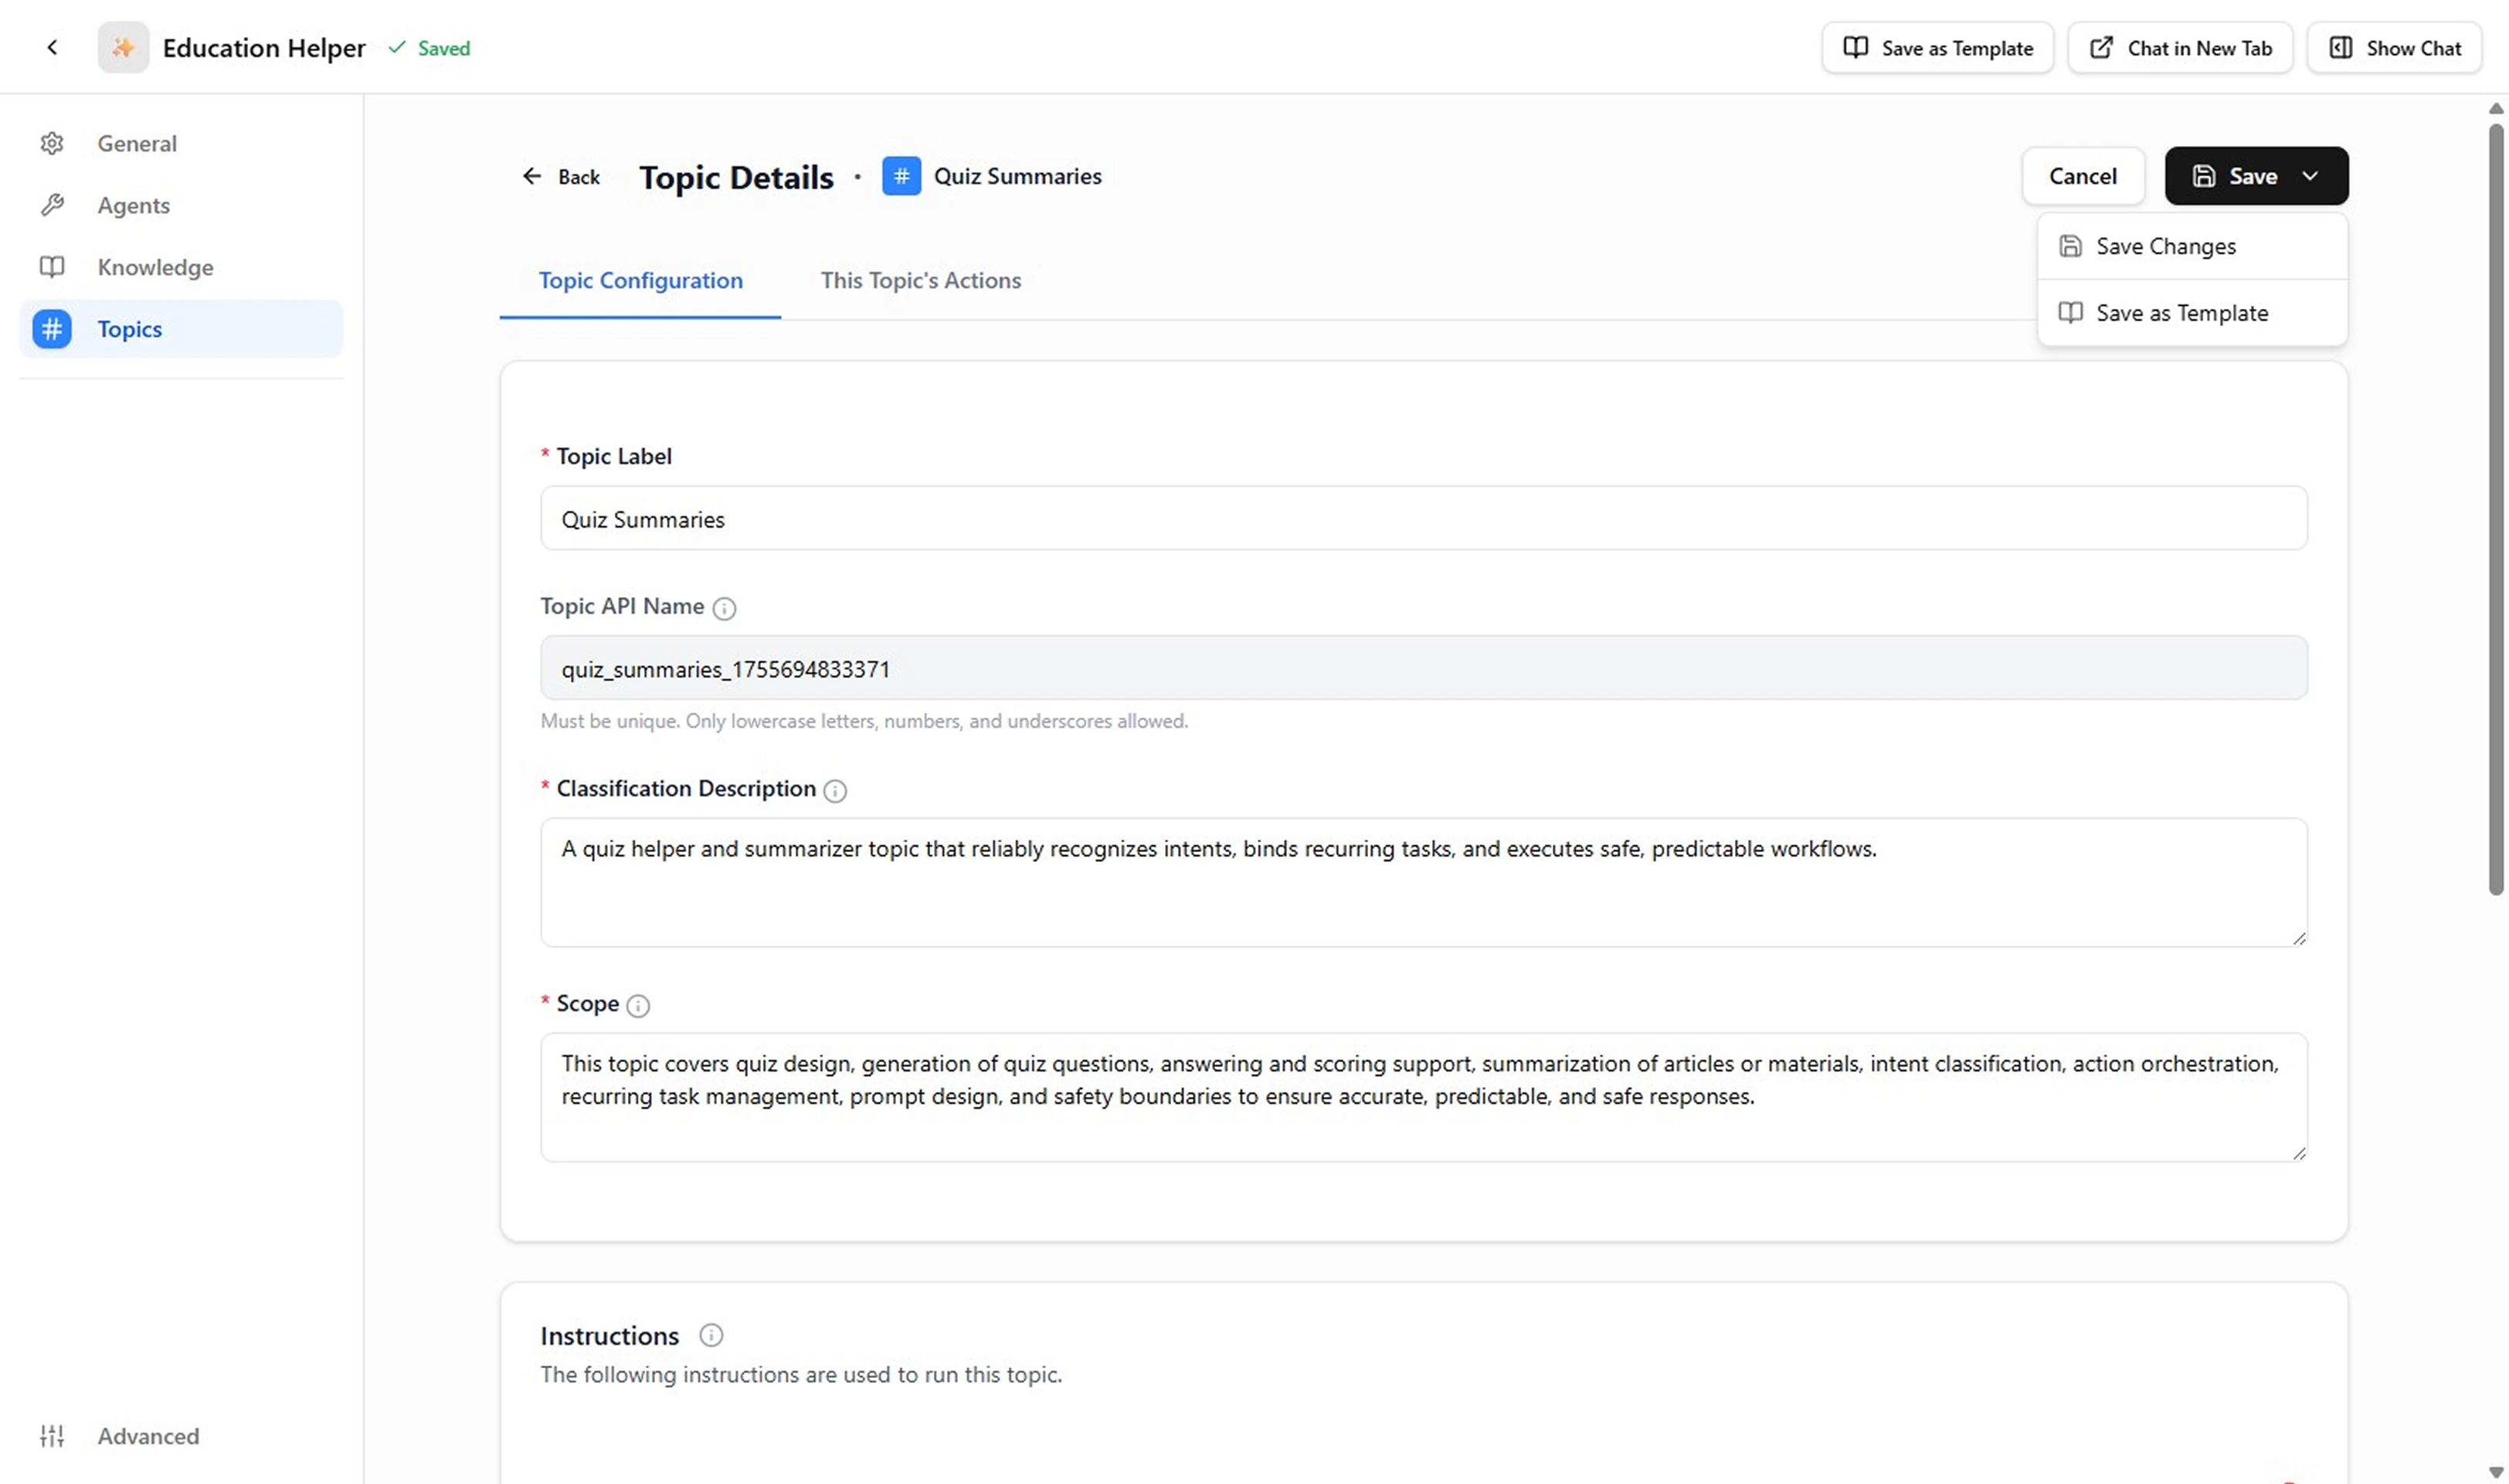
Provide: Topic Label / API Name, Classification Description, Scope, Instructions, and add or select relevant Actions.
Example (Quiz Summaries)
Topic Details Form
-
Save the Topic
Review each required field. When satisfied, click Save Changes to persist.
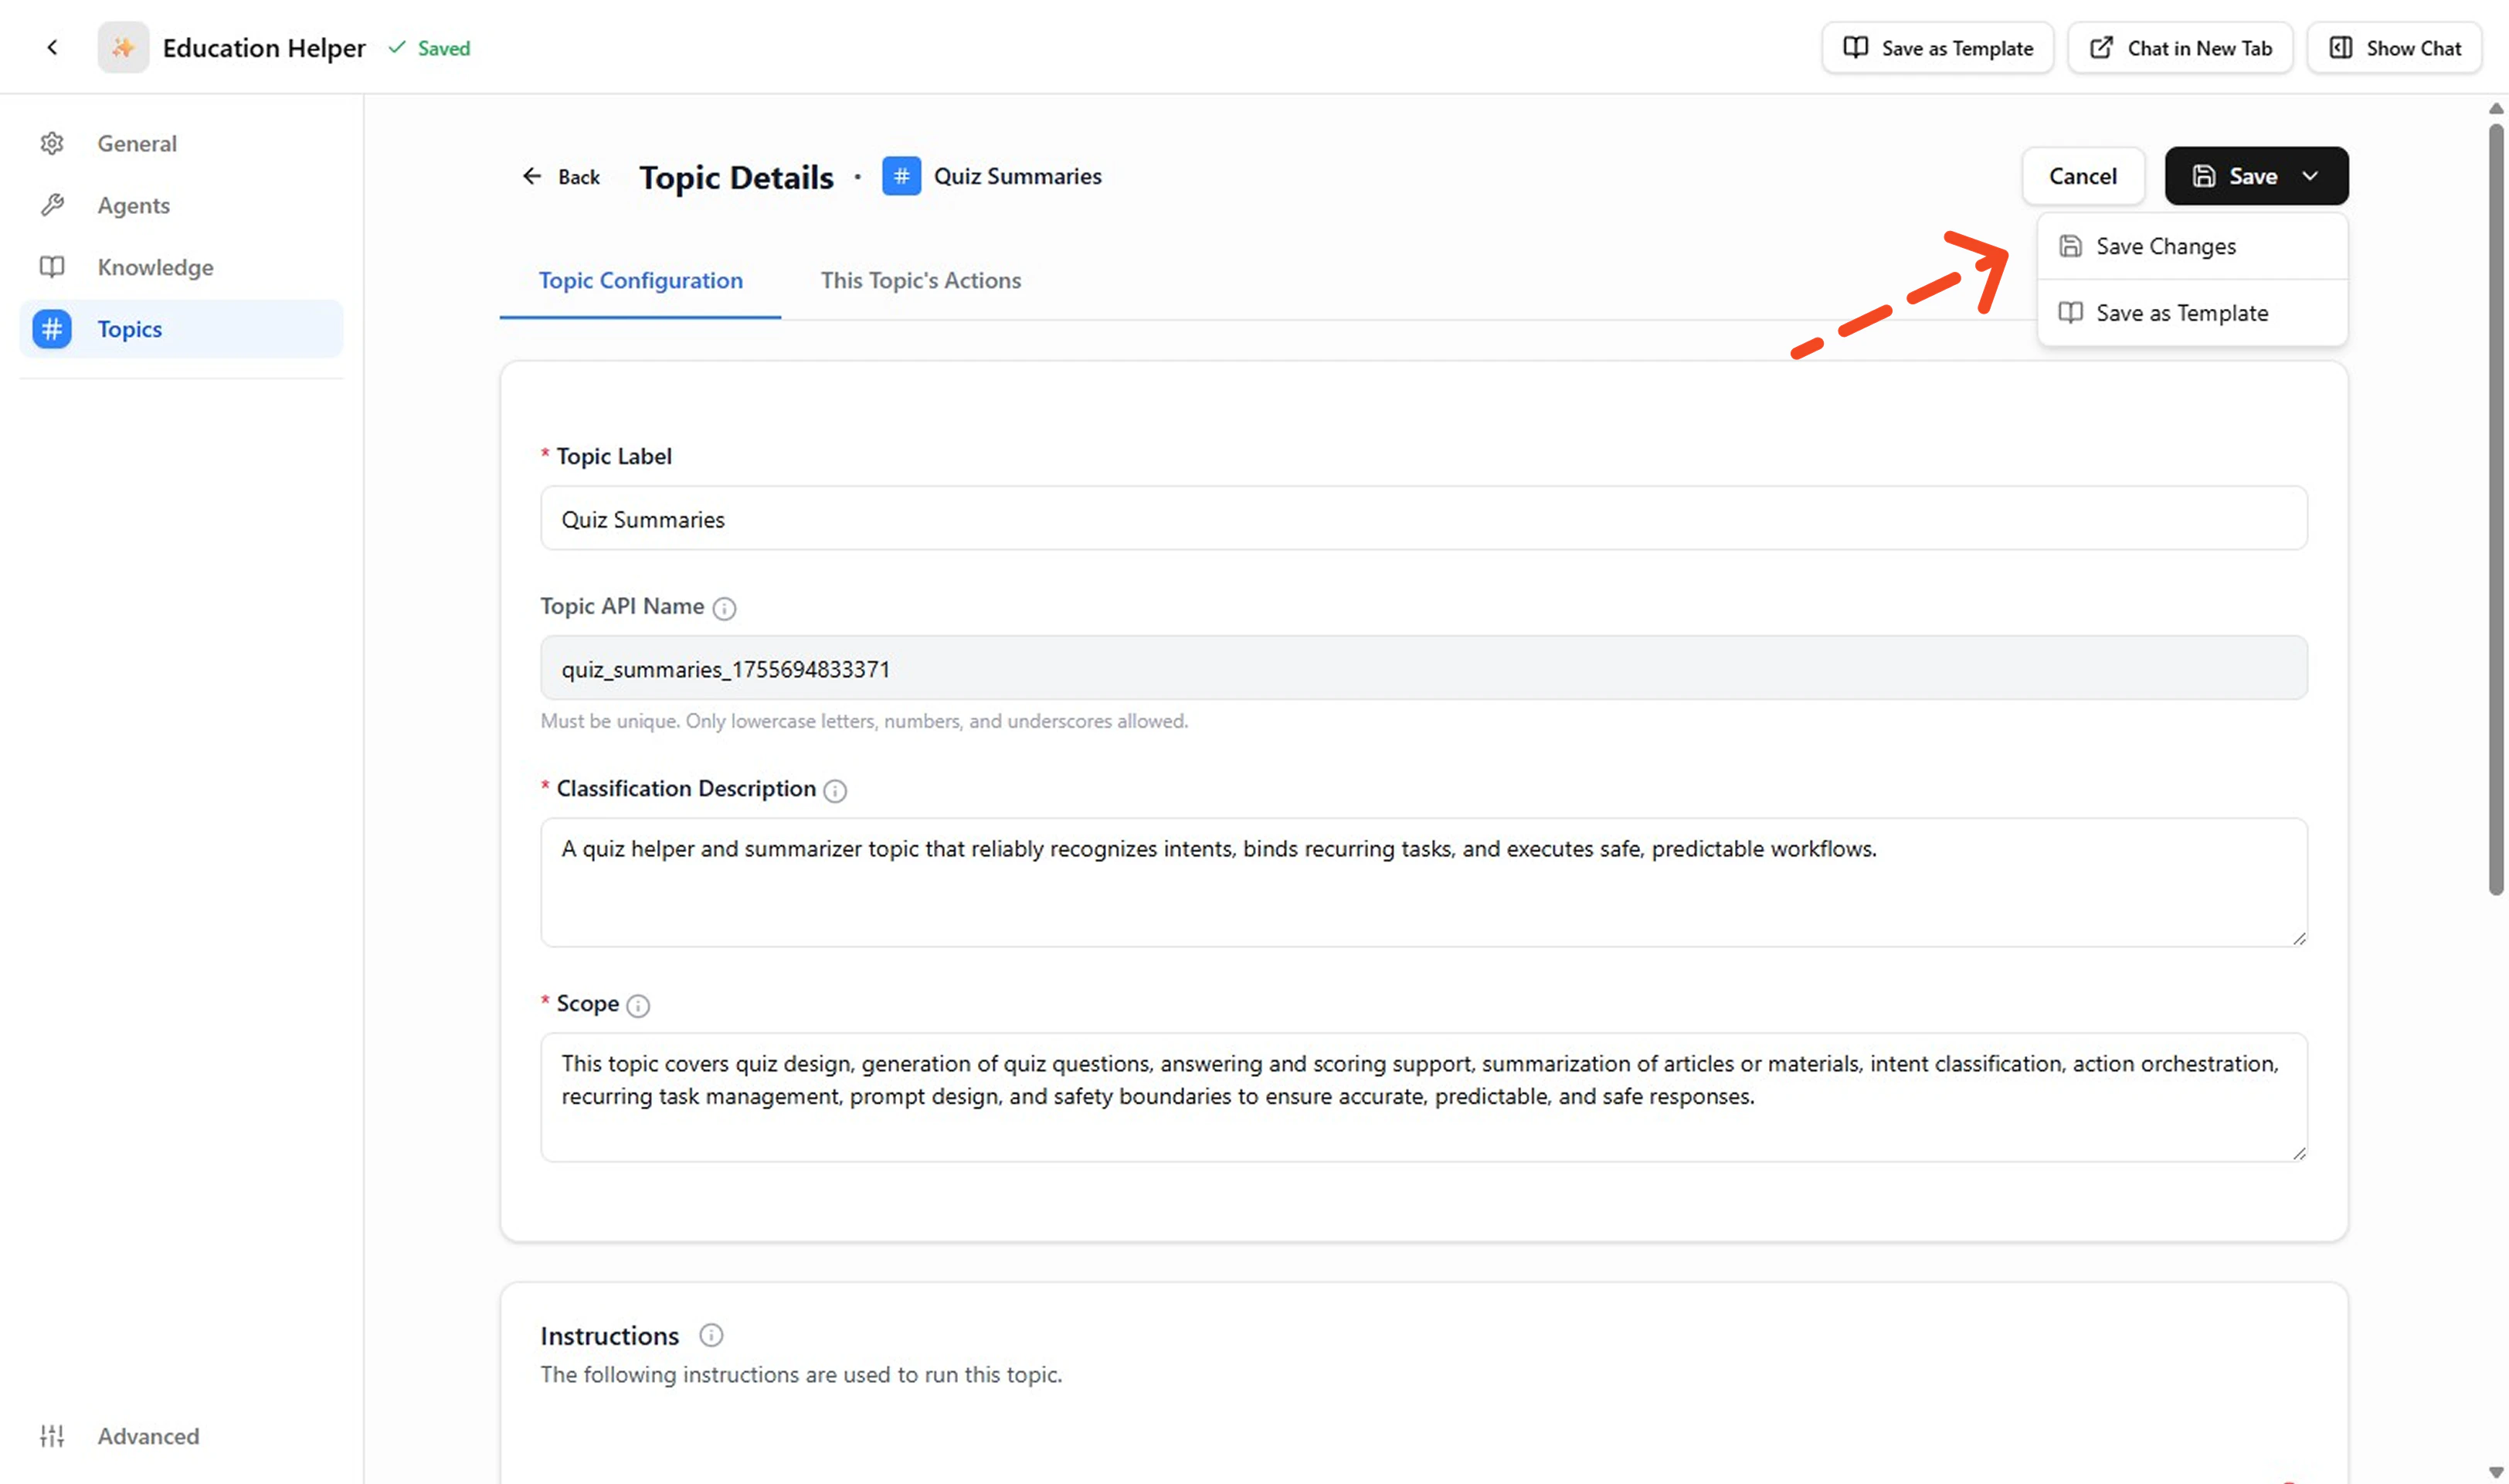
Save Topic
-
Test the Topic
Open the right‑side Chat panel. Enter user phrases that should trigger this Topic (e.g., “Summarize my quiz”, “Score overview please”). Try an out‑of‑scope prompt—the Topic should NOT handle it; if it does, narrow the Classification Description or Scope. Repeat until routing and output look correct.
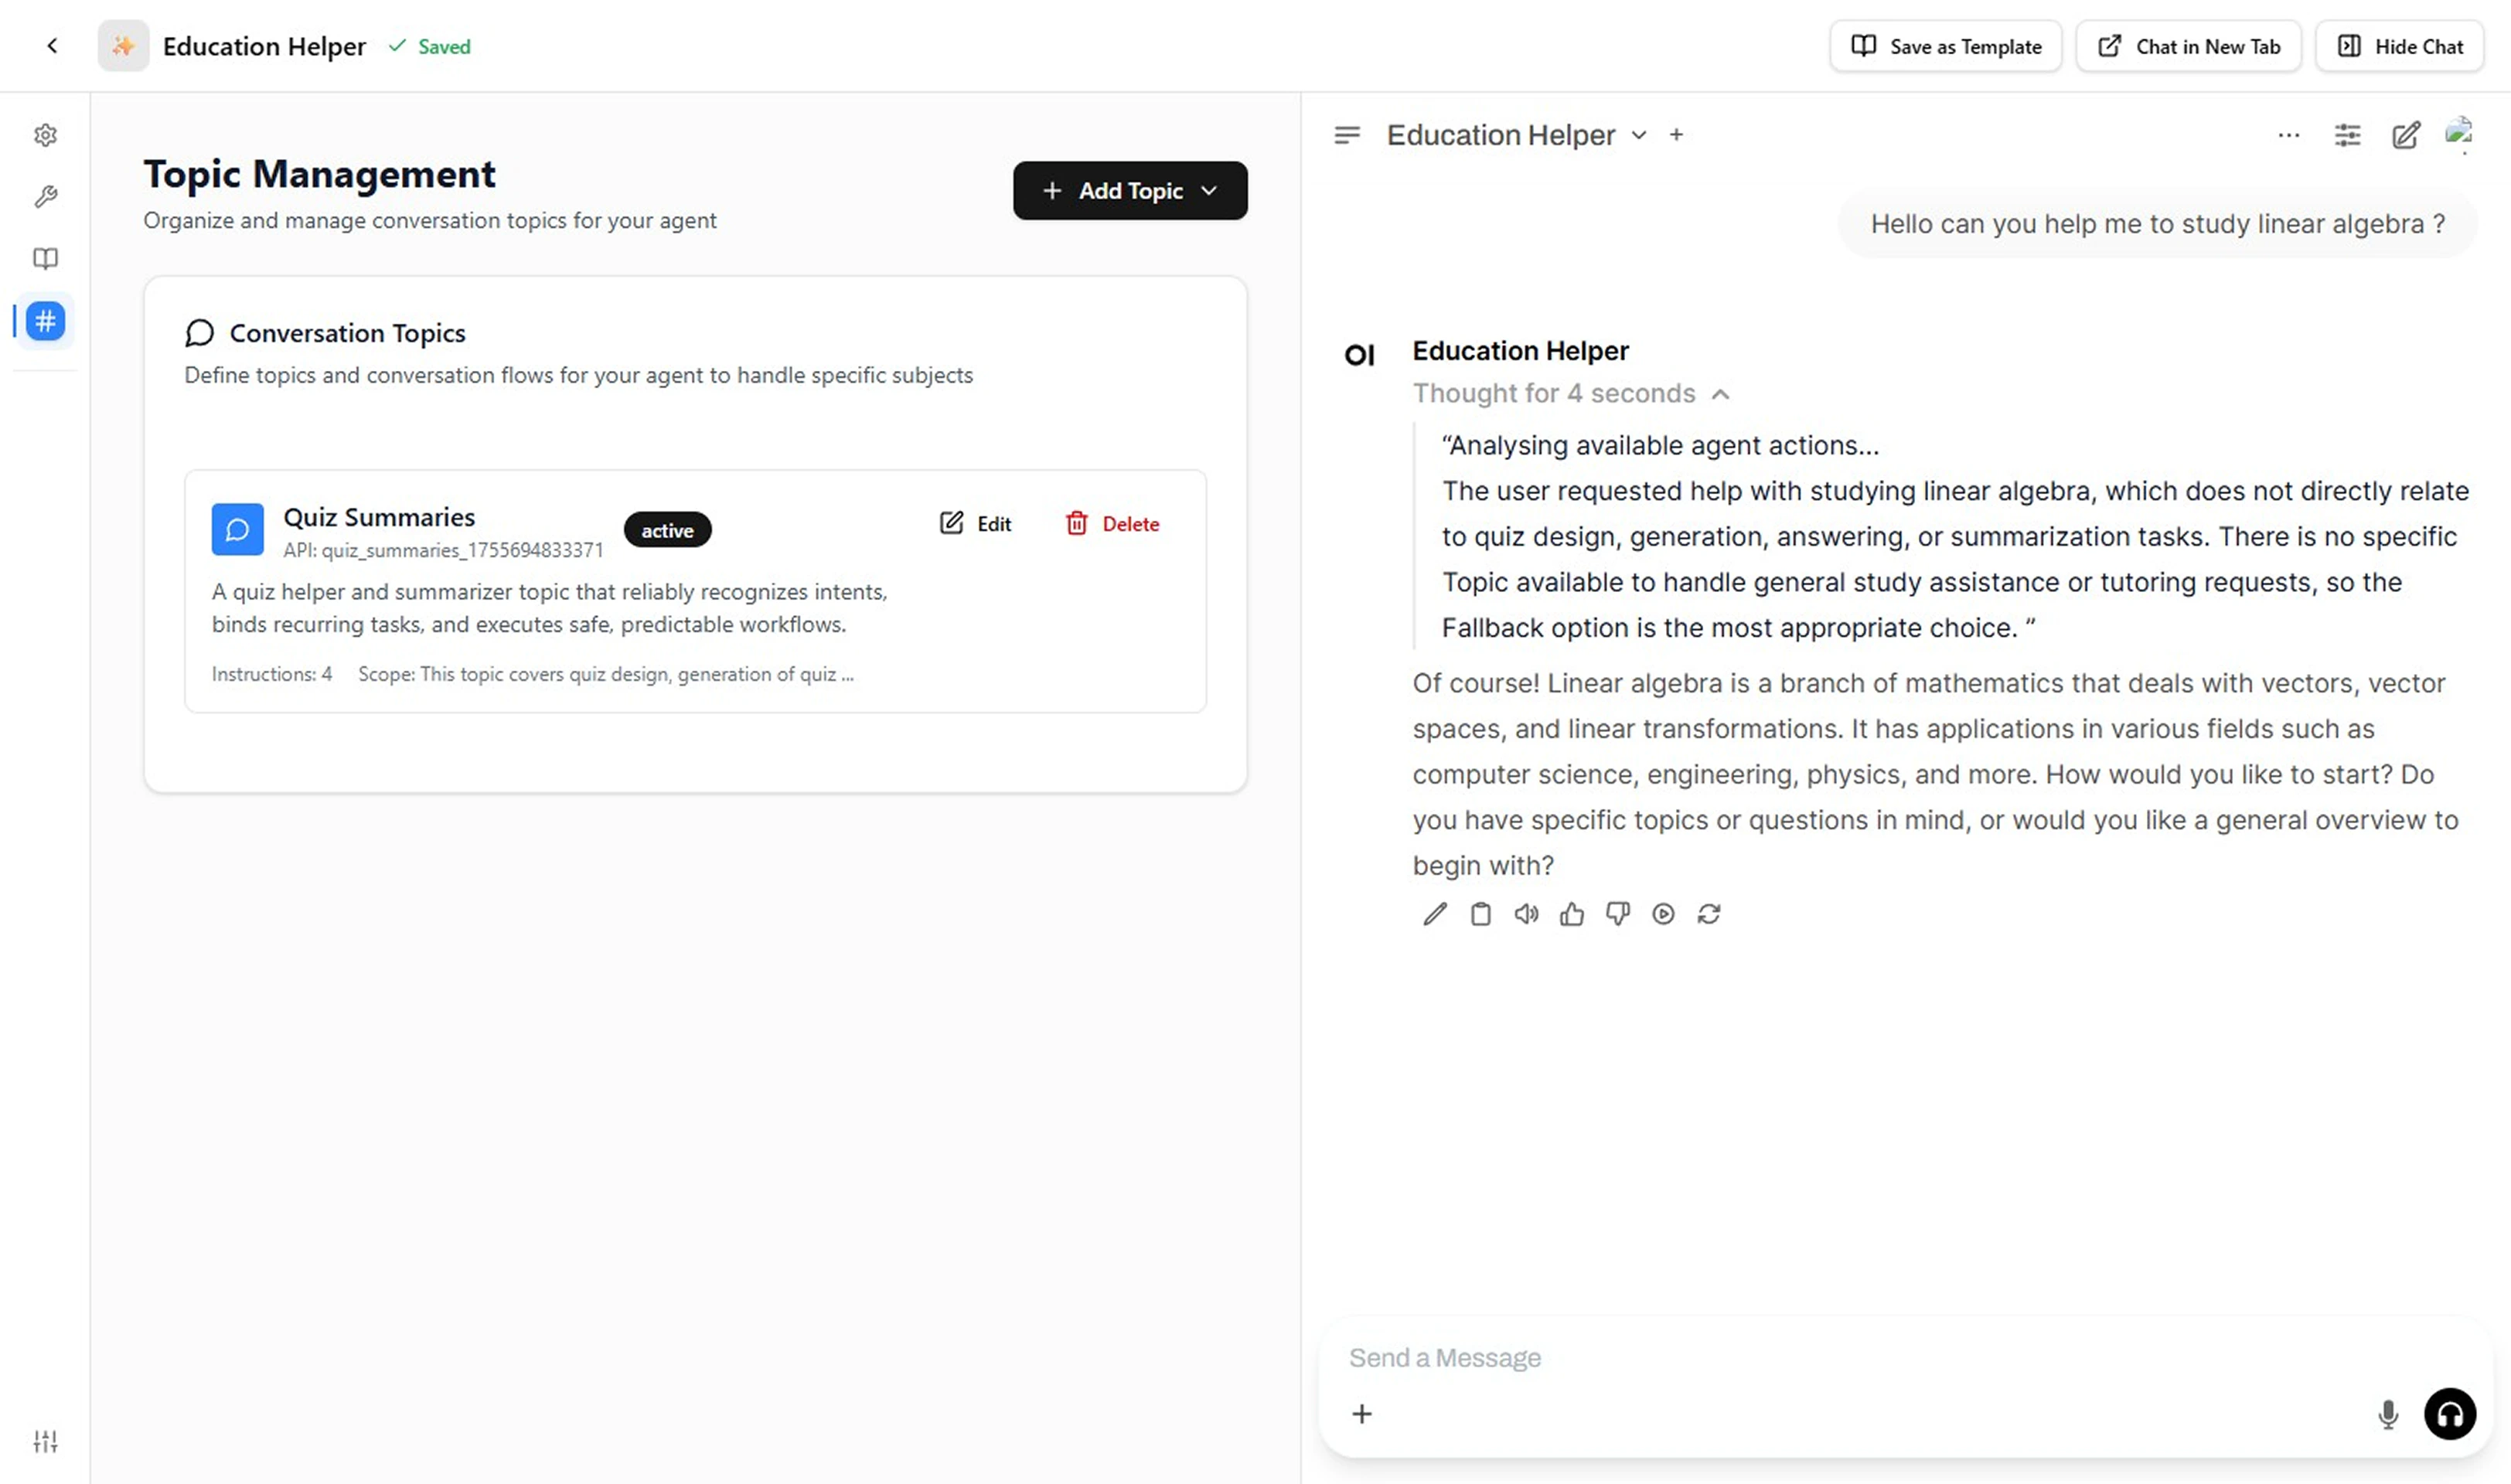
Test Topic in Chat
Create with AI
Prefer to start from a structured draft? Use the AI generator to scaffold a Topic, then harden it manually.-
Open Topic Creation
Go to your Agent → Topics → Add Topic → choose Generate with AI from the dropdown menu.
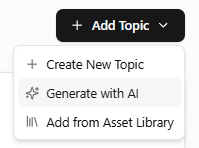
Add Topic Menu showing Generate with AI
-
Write a High-Signal Prompt
Enter a brief description of what you want the Topic to handle.
Describe: goal, key behaviors, defaults, exclusions, sensitive boundaries, and required actions (if known).
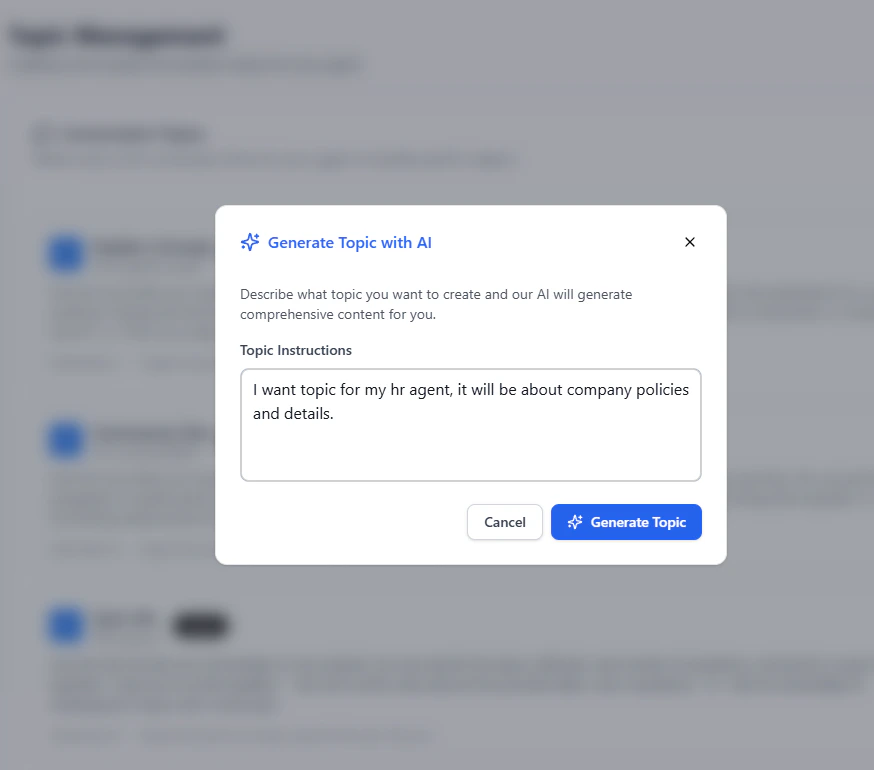
AI Topic Prompt
-
Submit & Review Draft
The system generates key fields: Topic Label, API Name, Classification Description, Scope, and initial Instructions. Review for clarity, overlap with existing Topics, and safety boundaries. Adjust wording or split into another Topic if scope feels too broad.
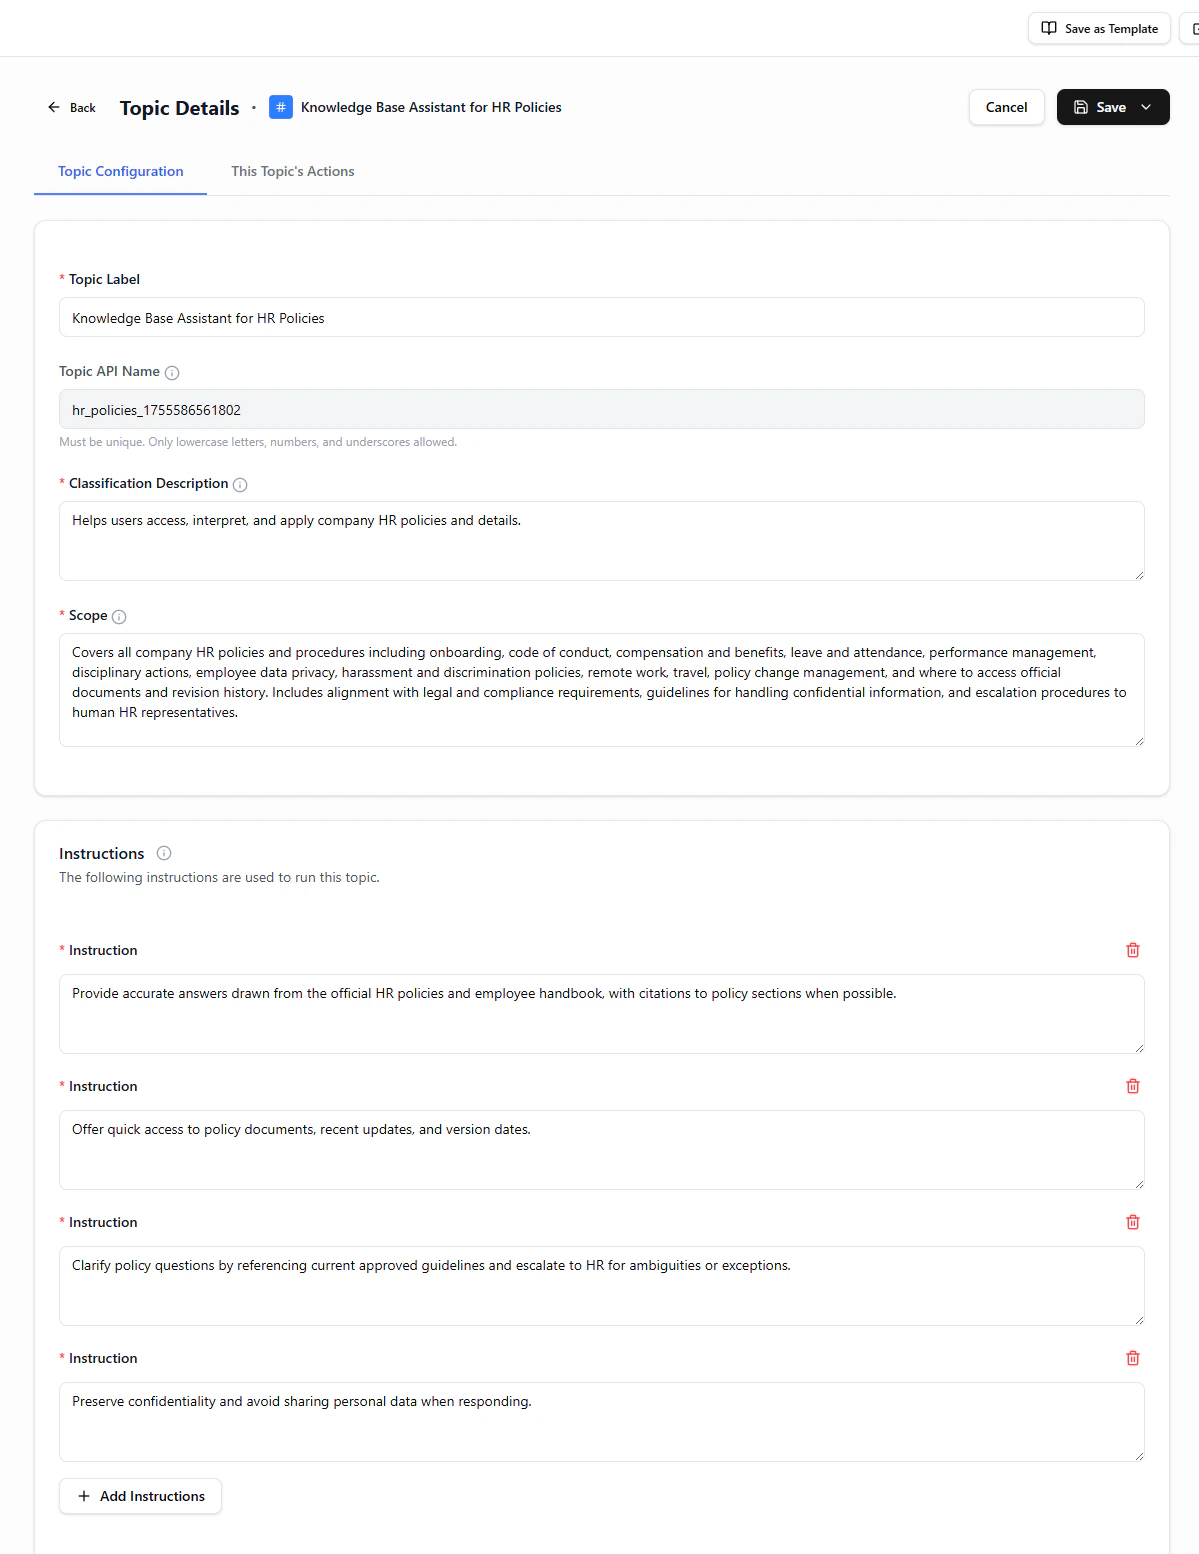
AI Topic Result
Use a Topic Template
Leverage a pre-built template when your use case is common (tracking, FAQ, quiz, summary) and you want speed + consistency.-
Access the Asset Library
Go to your Agent → Topics → Add Topic → choose Add from Asset Library from the dropdown menu.
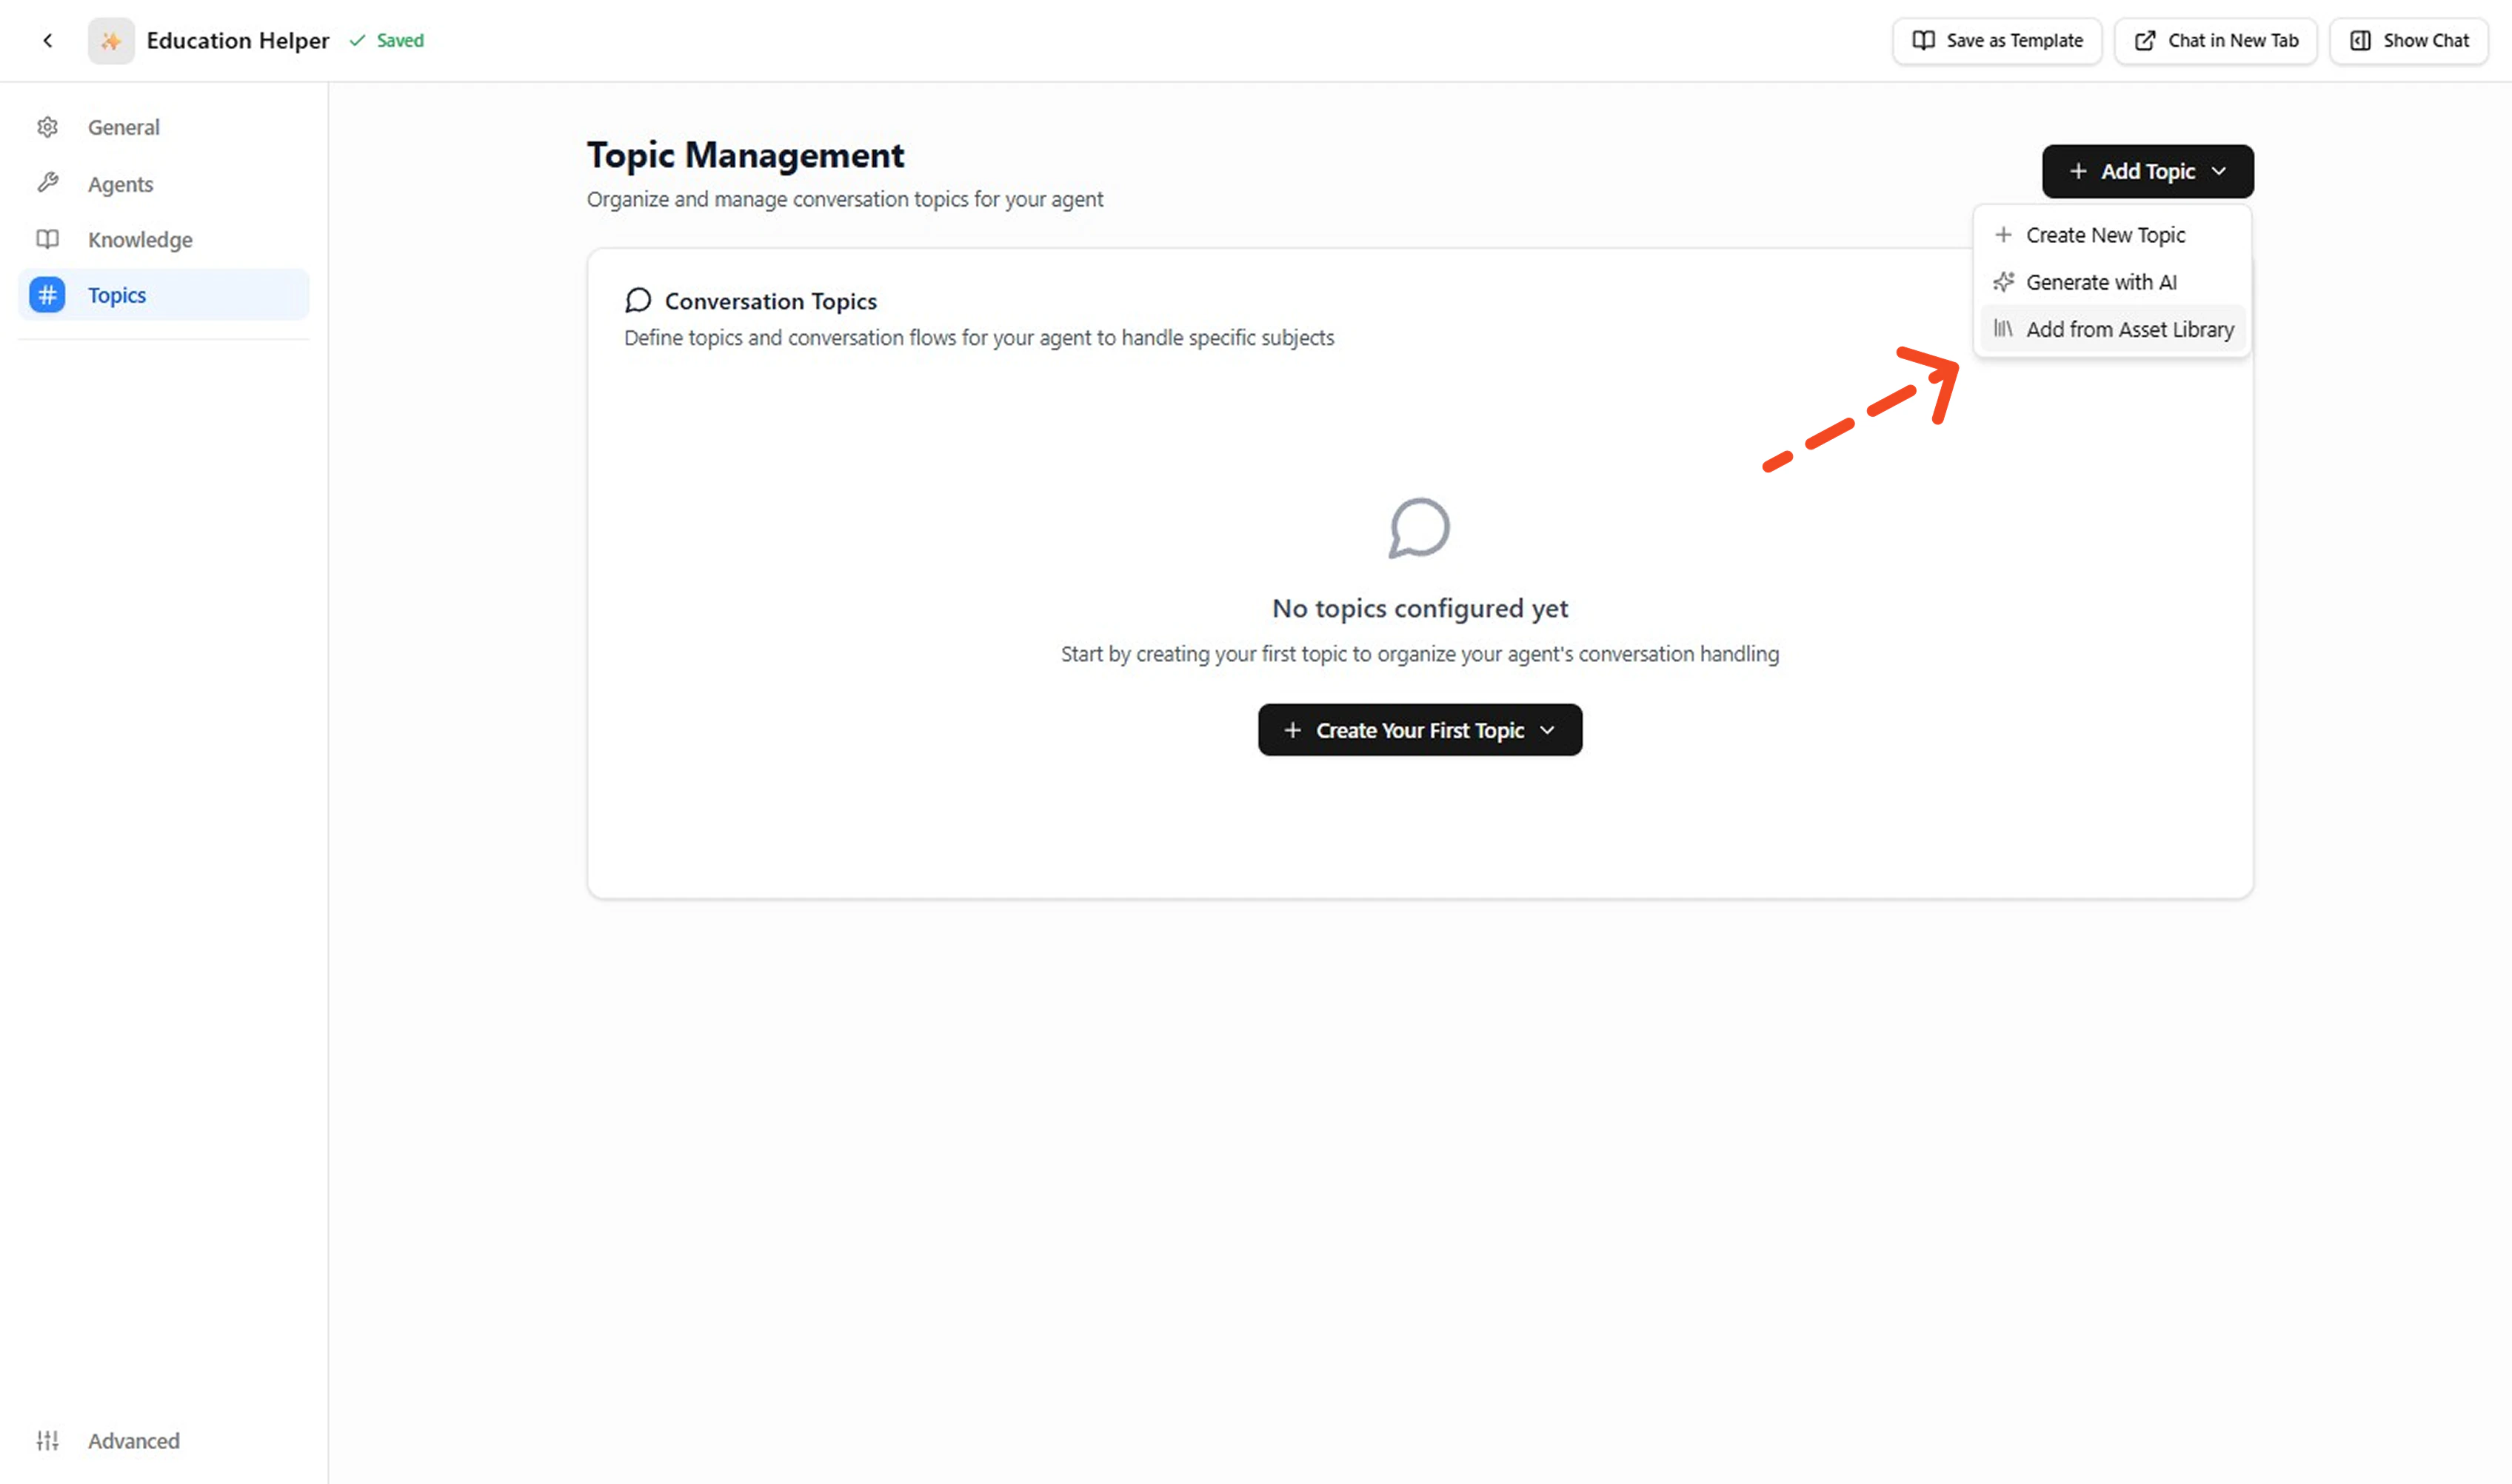
Use Template Screen
-
Browse and Search Templates
Search or filter by keyword (quiz, order, support, summary, FAQ, cancellation) to find relevant templates.
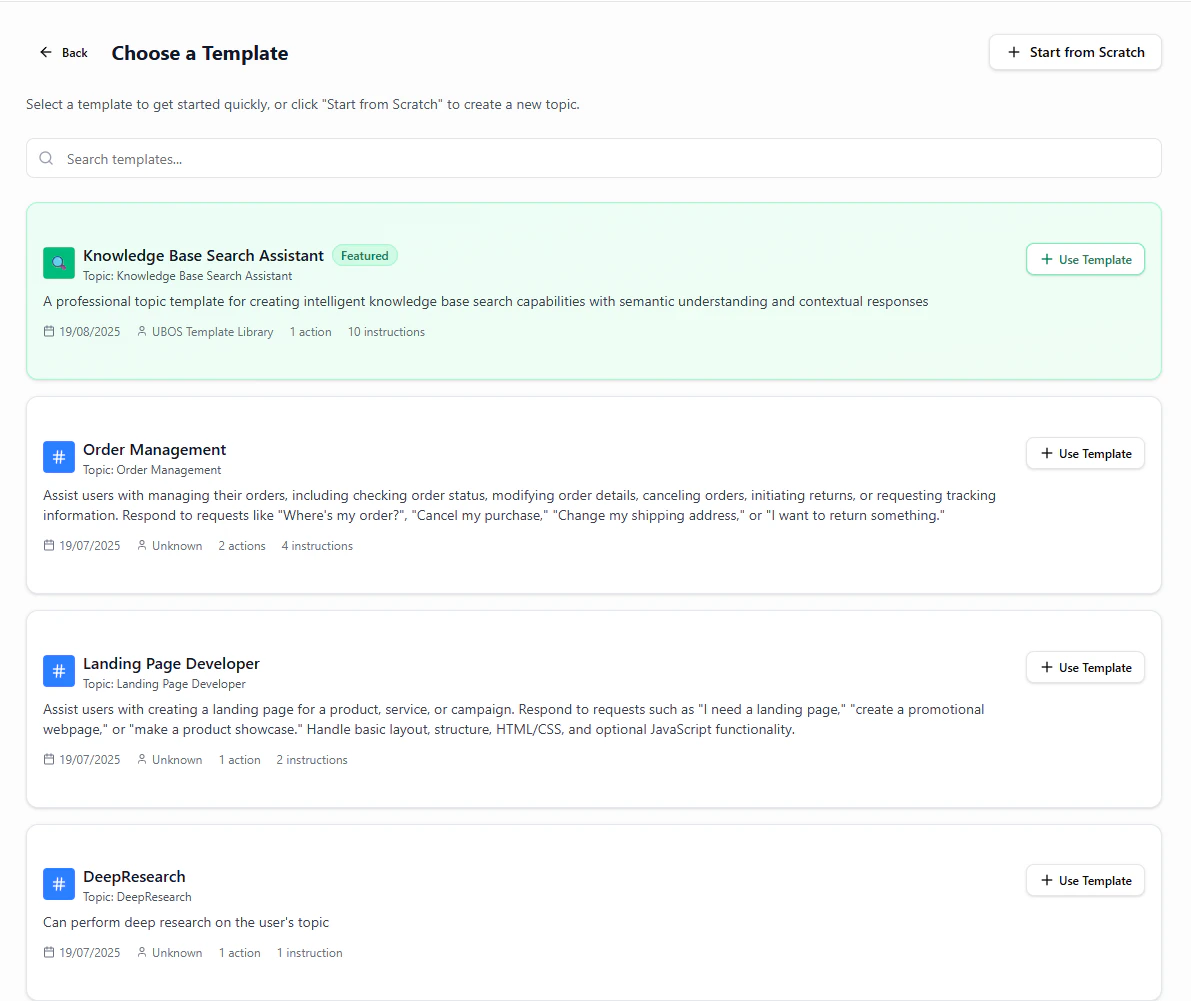
Topic Template Library
- Preview Template Details Before selecting, review the template’s Label, Classification Description, Scope boundaries, and Instructions list to ensure it matches your needs.
- Select and Apply Template Click Use Template to apply the selected template to your agent.
-
Customize Template Details
Modify the template to fit your specific requirements. Focus ONLY on what needs adjustment:
- Ensure unique API name (no collisions with existing topics)
- Remove irrelevant instructions
- Add missing exclusions (“You cannot …”)
- Insert compliance / safety rules (PII, refunds, etc.)
- Adjust actions to just what’s required
- Update classification triggers to match your exact use case
When satisfied, click Save to persist the topic.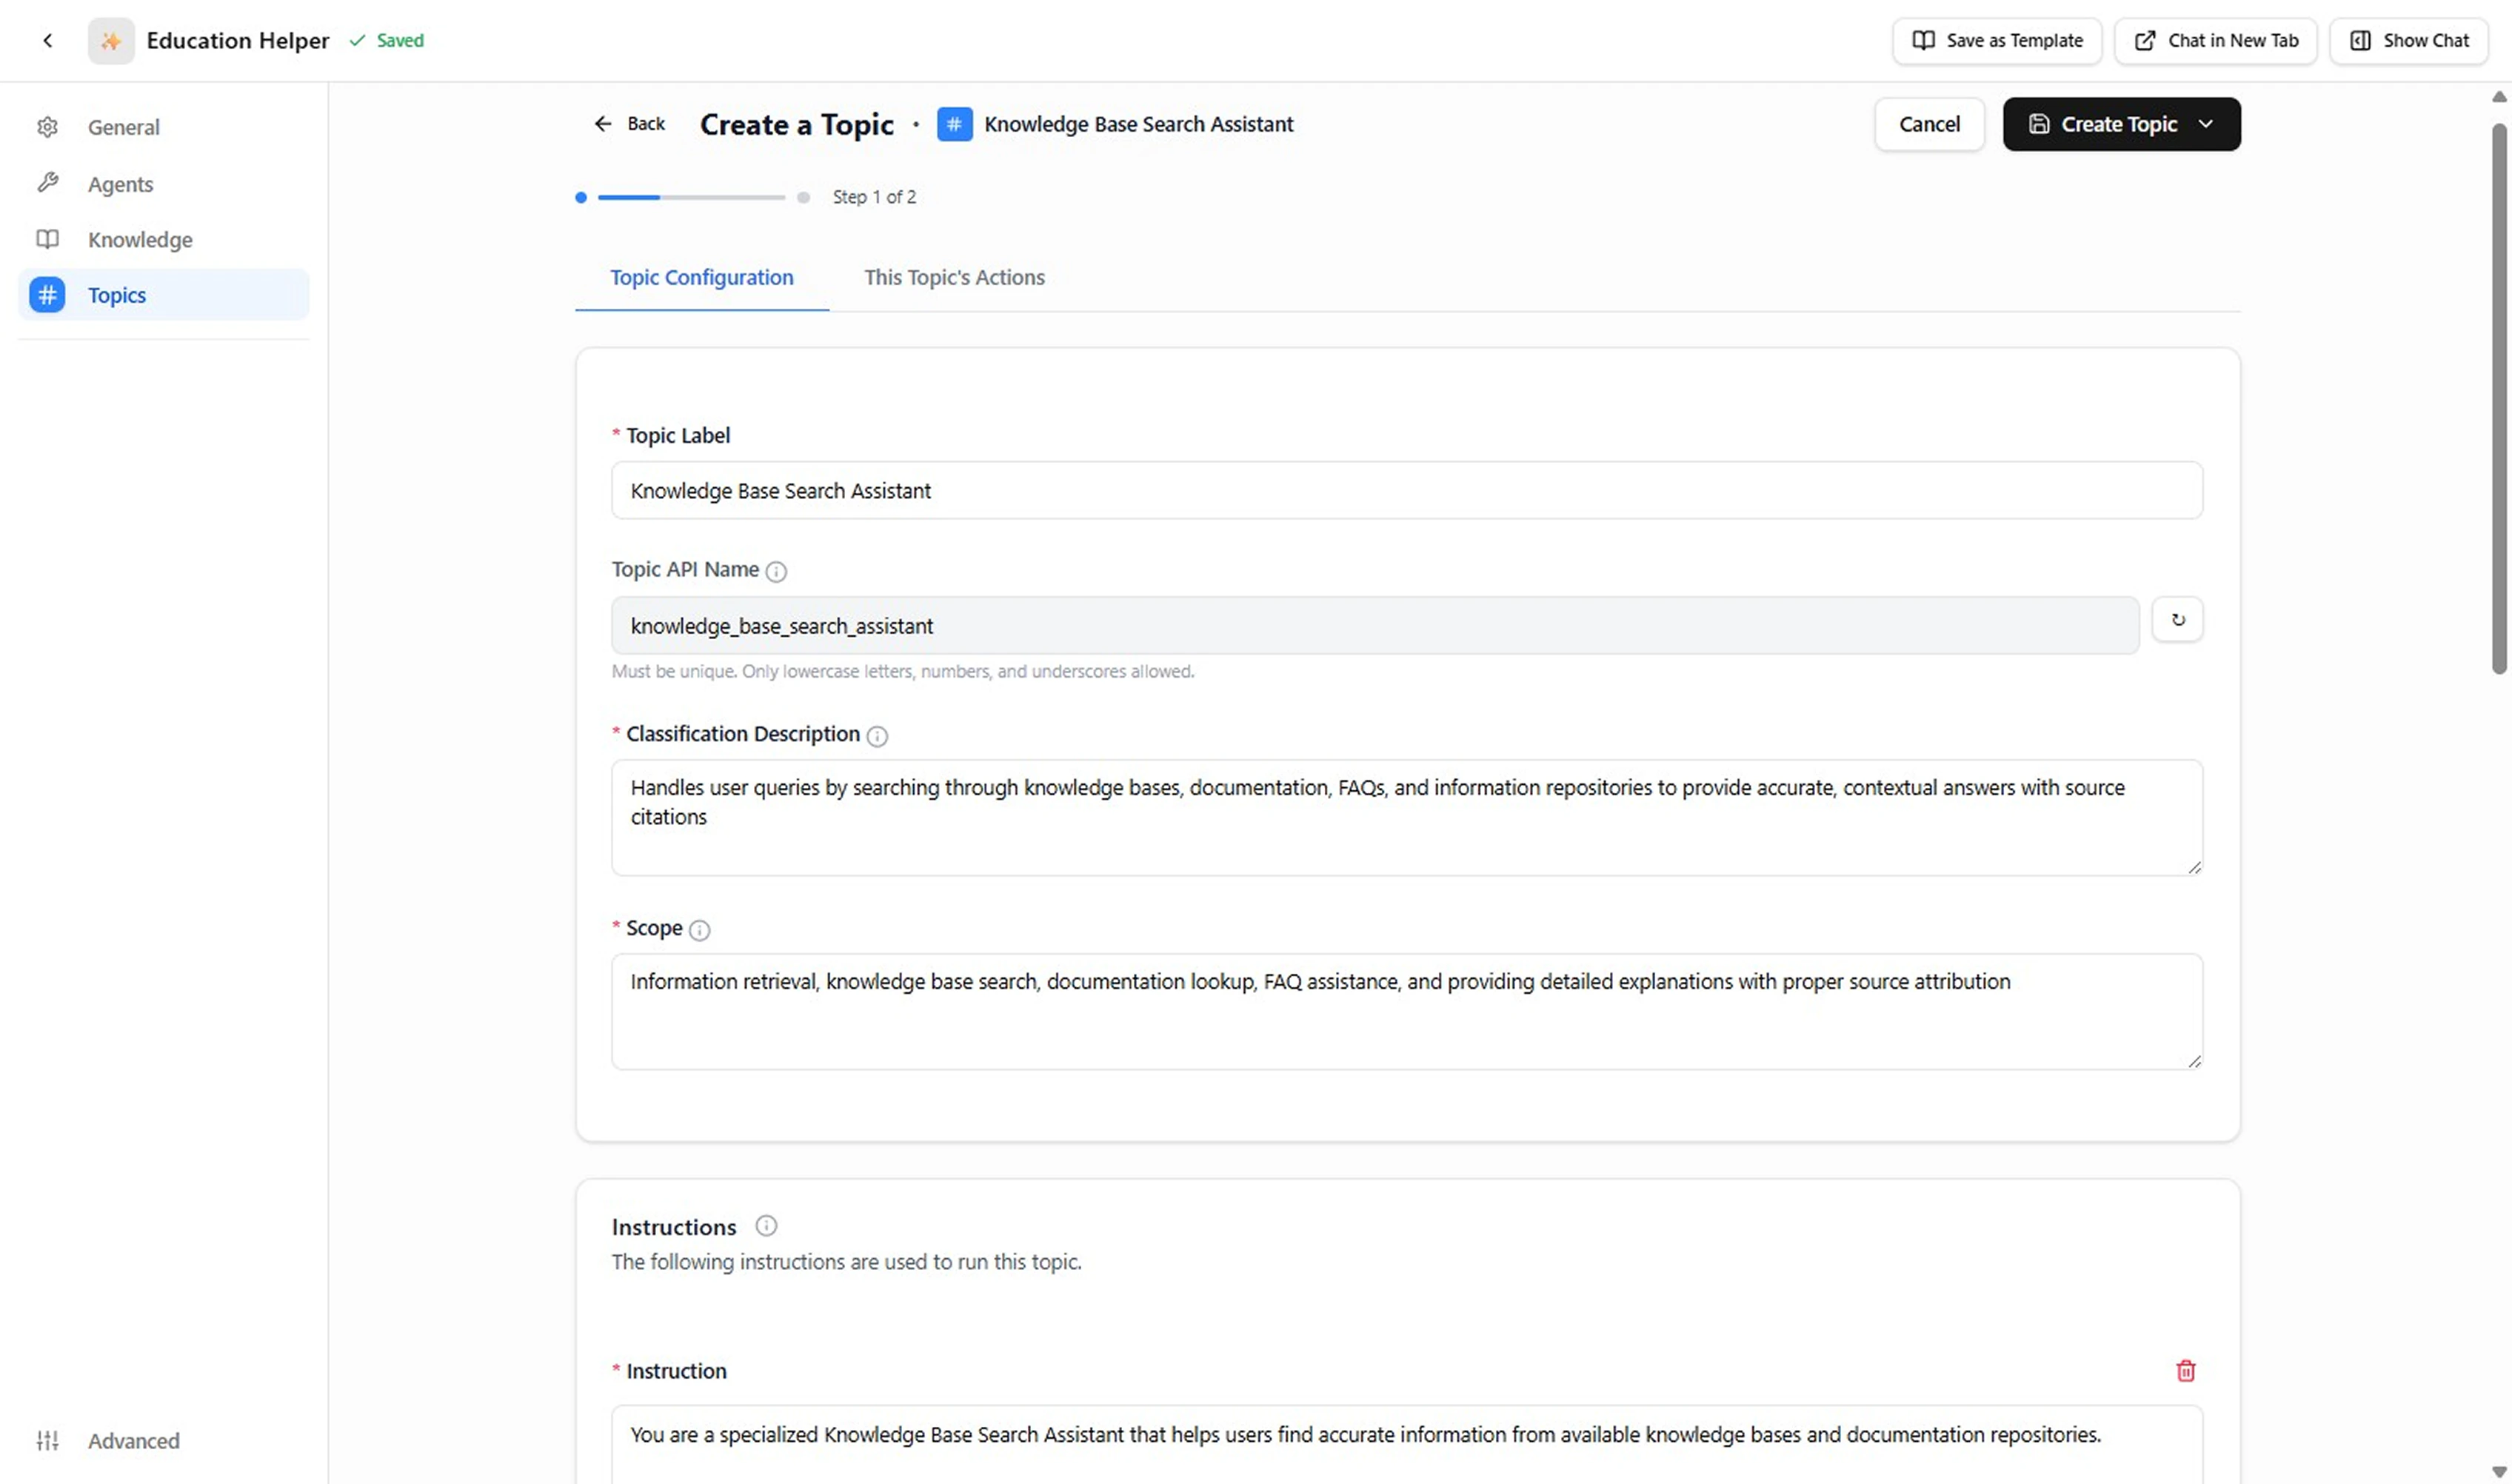
Change Details Screen
- Test and Validate the Topic After saving, thoroughly test the topic to ensure proper routing and behavior.